If you need assistance, please send an email to forum at 4hv dot org. To ensure your email is not marked as spam, please include the phrase "4hv help" in the subject line. You can also find assistance via IRC, at irc.shadowworld.net, room #hvcomm.
Support 4hv.org!
Donate:
4hv.org is hosted on a dedicated server. Unfortunately, this server costs and we rely on the help of site members to keep 4hv.org running. Please consider donating. We will place your name on the thanks list and you'll be helping to keep 4hv.org alive and free for everyone. Members whose names appear in red bold have donated recently. Green bold denotes those who have recently donated to keep the server carbon neutral.
Special Thanks To:
Aaron Holmes
Aaron Wheeler
Adam Horden
Alan Scrimgeour
Andre
Andrew Haynes
Anonymous000
asabase
Austin Weil
barney
Barry
Bert Hickman
Bill Kukowski
Blitzorn
Brandon Paradelas
Bruce Bowling
BubeeMike
Byong Park
Cesiumsponge
Chris F.
Chris Hooper
Corey Worthington
Derek Woodroffe
Dalus
Dan Strother
Daniel Davis
Daniel Uhrenholt
datasheetarchive
Dave Billington
Dave Marshall
David F.
Dennis Rogers
drelectrix
Dr. John Gudenas
Dr. Spark
E.TexasTesla
eastvoltresearch
Eirik Taylor
Erik Dyakov
Erlend^SE
Finn Hammer
Firebug24k
GalliumMan
Gary Peterson
George Slade
GhostNull
Gordon Mcknight
Graham Armitage
Grant
GreySoul
Henry H
IamSmooth
In memory of Leo Powning
Jacob Cash
James Howells
James Pawson
Jeff Greenfield
Jeff Thomas
Jesse Frost
Jim Mitchell
jlr134
Joe Mastroianni
John Forcina
John Oberg
John Willcutt
Jon Newcomb
klugesmith
Leslie Wright
Lutz Hoffman
Mads Barnkob
Martin King
Mats Karlsson
Matt Gibson
Matthew Guidry
mbd
Michael D'Angelo
Mikkel
mileswaldron
mister_rf
Neil Foster
Nick de Smith
Nick Soroka
nicklenorp
Nik
Norman Stanley
Patrick Coleman
Paul Brodie
Paul Jordan
Paul Montgomery
Ped
Peter Krogen
Peter Terren
PhilGood
Richard Feldman
Robert Bush
Royce Bailey
Scott Fusare
Scott Newman
smiffy
Stella
Steven Busic
Steve Conner
Steve Jones
Steve Ward
Sulaiman
Thomas Coyle
Thomas A. Wallace
Thomas W
Timo
Torch
Ulf Jonsson
vasil
Vaxian
vladi mazzilli
wastehl
Weston
William Kim
William N.
William Stehl
Wesley Venis
The aforementioned have contributed financially to the continuing triumph of 4hv.org. They are deserving of my most heartfelt thanks.
Registered Member #1153
Joined: Mon Dec 03 2007, 07:27PM
Location: Croatia
Posts: 213
Last update: 27 / 10 / 2008
So after bunch of SGTC-s and whole bunch more of SSTC-s, it is time for a first DRSSTC!
I will write all costs if in case somebody wants to replicate project or simply if anybody here is interested in the project.
I removed the "steps" because it was confusing. Im just writing a total until now:
Invested until now : 3200,00 $
------------------------------------------------
--------------------------------------------------
------- *(1) Cost of MMC is same like in original but i will instead use 12 capacitors CD9420C20P15K. Simply i don't want to use a fan to cool down capacitor and want to add little bit more reliability.
*(2) The total of digikey would be little smaller but i ordered some simple things like IC-s by triple just in case some components let the magic smoke out. But its maximally 5-10 $ difference. However they was out of stock on TVS and some more little things so in final it would be more or less same!
*(3) Thankfully to Steve Ward i have a bridge capacitor. Thanks Steve!
*(4) Thankfully to teslacoolguy i have a MMC. Thanks teslacoolguy!
I got the fan for case today, i think it will suit to plexy base. Here is actual photo of it:
My friend winded the transformer for me. HV insulating sheet between every layer, vacuum potted in shellac. I'm just calculating and im sure a 48 VA is a overkill! And since i want my coil to be light as possible i will order another 25 VA. Oh and funny thing is that i have Chinese step down inverter 220-110 VAC 300 VA on same type of core . Croatian quality xformer photo:
I have decided that this transformer is and overkill definitely. So i ordered a 25 VA toroidal transformer. I also asked them not to put thermal fuse or any kind of protections thy regularly put in the core. We don't want such fuse open in middle of DRSSTC operation.
The new transformer arrived just today:
Here is the current heat sink i plan to use. However its just thinking because i don't have the actual boards still. I want my setup to be light so i will use a small value temperature shutdown setup and a smaller heat sink with a high power papst fan. Im sure it will not overheat. I just need to get the boards to see what can i push there:
I decided not to use this one because it dissipates too little heat. I decided to to use tower copper heat sink or sintered heat pipe nitrogon type.
Here is first heatsink to be used
Or this one :
I will machine bigger copper bases for mounting IGBT-s
DRSSTC BASE Construction will follow today, just need to cut the threads
I decided not to use this base. The 5 mm plexy is to thin to support coil as need. I will use a 10 mm plexy.
Here is the new base:
Its blue because its color of protective film, its crystal clear usually :)
And mounts for the fan that will cool everything in there generally.
Built the base and thats all i can do because my boards didn't come yet. Strange parts ordered two weeks after them came on time.
Finished the base and mounted the fan:
I think it will be pretty, if DRSSTC does not kill it
Looking how would heat sinks fit in there. And im surely going for nitrogon. The fan on this one gives enough airflow to cool down the IGBTS without even any heat sink
This one does not look bad either but i made my choice. This one will stay for some other project (little bad photo here):
Digikey order comes:
Secondary:
Current status:
Time to work on the heatsink:
First unsolder the original small copper base
Then i got a big block of copper, put it in vice and started waving the hand saw like a lunatic ( i thought i will die before cutting this piece) for 1 hour and i get this:
Then solder it to the heat pipes. Its was very hard because i don't have enough powerful blow torch:
Then prepare it for painting:
Then paint it and finished:
Decided to change heat sink again!
Made the primary supports:
And the secondary end caps:
Made the primary:
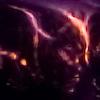
First preliminary testing:
Interrupter for "test" :
No updates for long time. Since im moving to my house soon i packed many of things and simply my DRSSTC got pushed to a small bedroom until then, its not fun.
I started working on the interrupter. I don't have a casing for it so its "open" for now. In this country everything is strange so i needed to search 7 days for a DPDT switch for auto/normal and only then i found not exactly like needed. The white bloobs are silicone glue holding the leds on place.
This is finished interupter:
This is the cable i made for interupter:
Its dual clinch. The interrupter output is a male audio jack going in 2X cinch splitter (AUX mode and BURST/AUTO(SINGLE SHOT) and on the DRSSTC side there is a cinch to BNC converter which goes to BNC on board.
MMC, little bit made in a hurry
And toroid i made (until a spun toroid does not arrive)
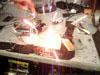
Time to fire it! I first feed the coil from a Statron bench power supply. Everything was working fine, got a nice small discharge, tested all interrupter modes (and burst does not work, i will need to inspect it). After approximately 30 seconds BANG! The drsstc blew all 3 Statron channels. Then i feed it trough 2 small transformers 220 V to 12 and then 12 to 220 V and everything was fine. Time to connect it to the wall, no choice (i don't have a variac). Coil works fine but i didn't push it very far because:
1. Dont have strike rail 2. Dont have proper toroid (i get 6-14 sparks on all sides, not one long discharge)
However i have let it rip at maximum PW and PRF for 30 minutes and everything was ice cold, no problems at all. I have over current limit to 300 A and it is tripping all the time, however the LED current meter goes only to 100 A.
Time to finish just the small bits and move on to a bigger DRSSTC, after torturing this one as much i can :)
Additional photos of the base at this moment. I need to think out how to shield everything in there now.
Here is few photos. Tonight i will take video. I made a bridge rectifier from some HUGE diodes and now its fine. Im torturing the coil in max PW and max PRF all the time, works wonderfully reliable.
Registered Member #1157
Joined: Thu Dec 06 2007, 12:11PM
Location: Houston, TX
Posts: 307
Be sure to visit Austin's thread "Experience with the Minibrute"
It is a wealth of knowledge, and saved me countless hours of pain to be able to have all the issues they found right there in one resource. Plus Austin and Wirenut have a very quick response time when asking them questions.
Dr. Shock is Dan, the writer and creator of the minibrute, and he also gets back to you with haste when asked questions.
Also, I'm almost done with my minibrute, and should have a nice vid to go with it once everything is together.
I'm just finishing up the advanced modulator, intend to have it done this weekend in fact.
Rest assured, you have "peoples" you can rely on when you get stuck.
Registered Member #1153
Joined: Mon Dec 03 2007, 07:27PM
Location: Croatia
Posts: 213
Thanks Ultra7,
i read that topic from first page to last, 2 times.
Im taking my time with this one to bring it to be beautiful and functional. Im waiting for shipment of boards now, still no answer from EVR, maybe they are out of stock.
I will ask if i come in problems surely, but thankfully i have all needed gadgets to debug it and helping people here
For now biggest problem is bridge capacitor. Until i receive all my stuff and book can you tell me dimensions of base for coil? I would like to give it to machining since it will take some time.
Registered Member #1157
Joined: Thu Dec 06 2007, 12:11PM
Location: Houston, TX
Posts: 307
I'm not too keen on the metric system, I blame myself. So the measurements are in inches. the total dimensions are 12"L x 12"W 6"H/D for the entire bottom enclosure.
Registered Member #1153
Joined: Mon Dec 03 2007, 07:27PM
Location: Croatia
Posts: 213
Ultra7 wrote ...
I'm not too keen on the metric system, I blame myself. So the measurements are in inches. the total dimensions are 12"L x 12"W 6"H/D for the entire bottom enclosure.
Thank you. In case you will ever need 1 " is 2.54 centimeters and 100 cm is 1 meter
So dimensions are in metric:
30.48 cm L X 30.48 cm W X 15.24 cm H
And again thank you
Edit: I just found 2 new coolers in my drawer. I hope will they fit on board
Registered Member #1153
Joined: Mon Dec 03 2007, 07:27PM
Location: Croatia
Posts: 213
I gave base to CNC machining.
The base plate will be cnc machined plexiglases with diamond polishing on end. The standoffs will be molded plexiglas. Pictures to come in 2 days. Added to cost
Registered Member #1025
Joined: Sun Sept 23 2007, 07:53PM
Location: Czech Rep.
Posts: 566
KresoLiubov wrote ...
Edit: I just found 2 new coolers in my drawer. I hope will they fit on board
I have found very simillar cooler recently in the old PC trash, do not have any use for it yet. These coolers look very sexy, however, is this "heat-pipes" technology really so good? I mean, the Cu plate which is in contact with the transistor is relatively thin and the connection to the heat-pipes involves very small area of the plate. Wouldn't it be better to have rather some kind of classics - a fat piece of AL (or ideally Cu) with few ribs ? Does anyone has any experience with this type of coolers?
Registered Member #1083
Joined: Mon Oct 29 2007, 06:16PM
Location: Upland, California
Posts: 256
If I remember correctly, large surface area dissipates heat much better than a large solid mass. The more fins there are, the better and if they are tiny, you can pack a lot more cooling fins in a small area. Small fins dissipate heat more quickly than larger fins. I hope that makes sense
This site is powered by e107, which is released under the GNU GPL License. All work on this site, except where otherwise noted, is licensed under a Creative Commons Attribution-ShareAlike 2.5 License. By submitting any information to this site, you agree that anything submitted will be so licensed. Please read our Disclaimer and Policies page for information on your rights and responsibilities regarding this site.


 DRSSTC


 . Croatian quality xformer photo: