
Kaizer DRSSTC III
Mads Barnkob, Thu Jan 19 2012, 05:46PMProject website with all photoes:

Specifications (incomplete due to some future minor changes)
Bridge: 2x CM600DU-24FA IGBTs in a full bridge configuration
Bridge supply: Full wave rectified 3x400VAC, 4x 6000uF 350V filtering capacitors, two in series, two string in parallel for 6000uF at 700V.
Primary coil: 8 turns, flat primary.
MMC: 5 in series 4uF GTO snubber capacitors, rated at 3kV / 5kA peak for 0,8uF at 15kV.
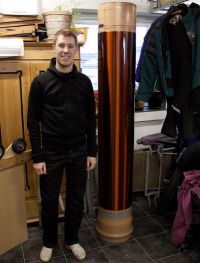
Secondary coil: 315 mm diameter, 1500 mm long, 2200 windings, 0,75 mm enamelled copper wire.
Topload: 7 rings of 25 mm aluminium tubing.
Resonant frequency: Around 38 kHz.
My first attempt on building a large DRSSTC, it is a costly affair and I have chosen to go the high impedance way, mostly for the cost reason, going low just is expensive :)
TODO LIST:
Finish enclosure
Tune for maximum power
COMPLETED LIST:
Gathering all parts
Winding secondary coil
Build enclosure
Build primary coil
Build driver
Build bridge
Test driver
Test bridge
Finish secondary coil with end caps
Build topload
Finish primary
Test bridge
24th December 2011
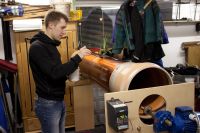
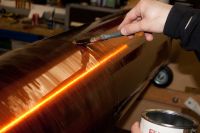
Actually construction on the coil begins, secondary coil is wound in a mere 3 hours with a brand new and much more stable winding rig than the old I had. 7 layers of varnish was applied over the next week.
29th December 2011
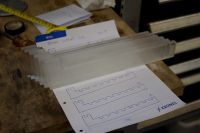
Making of primary supports from 10 and 12 mm acryllic from LCD monitors begin, a good week later they are finished and ready to be mounted on the primary base. The acryllic was almost rock hard to work with and splintered very easy, to our huge disappointment they cracked like nothing after drilling holes to mount them. We suspect it is either tensions from the milling or the acryllic type, cast, extruded, we dont know. We just lost many hours work in this.
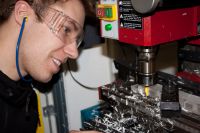
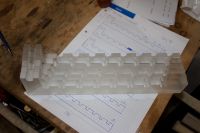
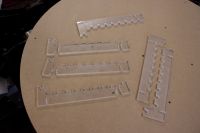
14th May 2012
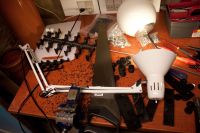
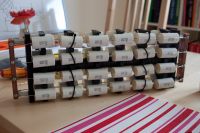
When I first found these pieces of scrap PVC, my first thought was to use the already made holes to put the leads through and distance the capacitors that way. But recalling that Finn Hammer made a fishbone like skeleton fos his MMC, I tried something like it and ended up using all the plastic, even the cut outs that is used for the backbone. The end terminals of 20×10 mm copper is overkill, but was what the scrapyard had at hand that day, they do however make a good connection in the sides for the capacitor strings.
The result is half of the MMC is completed. 0,2uF at 12kV. The completed MMC will be 0,4uF at 12kV.
17th May 2012
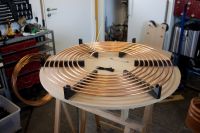
New primary supports was made from scrap PVC, I found some good pieces of 20 mm thick PVC to use for these.
18th May 2012
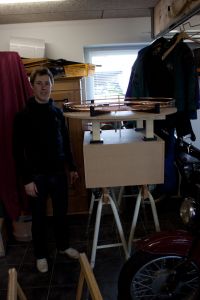
The enclosure have been put together with wheel mounted, the primary platform is raised from the enclosure to allow for taking the complete Tesla coil apart, make connections of cables and possible water cooling easier and to gain distance to metal objects in respect to the primary coil.
The enclosure and primary platform is entirely put together with only glue and wooden nails, nearest metal in the current construction is the wheels at the bottom.
6th October 2012
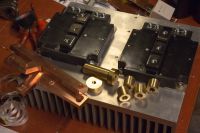
Copper bus bars for the bridge and spacers for capacitor mounting machined and milled. 260 mm² copper bars are used for the DC connection with the capacitors.
20th October 2012
Material for topload toroid construction was bought cheap from the scrap yard. 7 large rings of 25 mm diameter coaxial antenna cable, aluminium shield with PE foam filling and copper tubing core.
IGBTs mounted on heat sink, support for capacitors constructed and capacitors mounted on IGBTs. Construction of 3 phase rectifier bridge on heat sink and preparing mounting on the bridge supports.
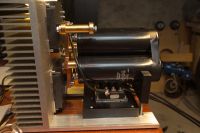
3rd November 2012
Finished installation of wheels on the enclosure and secondary coil was sawn over in both ends to get the right secondary tube length.
10th November 2012
Winding of the two GDTs, etching of gate PCBs and soldering of the gate PCBs and the GDTs.
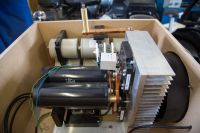
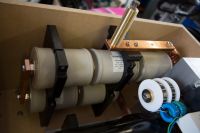
Mounted 3 phase bridge rectifier, DC cables, snubber capacitors and TVS strings.
All the busbar work have been done, in 30×10 mm copper and brass.
The new MMC consisting of 5x 4 uF at 3 kVDC for 0,8 uF at 15 kVDC have been installed with the bridge.
1st May 2013
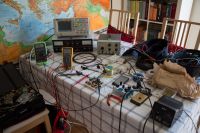
Bench test of driver was carried out. This is Steve Wards universal driver 2.1 converted to single sided board for through hole components only. Still some bugs and misroutings that was worked out during the test. The pulsewidth limiting network was bridged over as it caused some oscillations that made the driver turn the output on dispite no input from the interuptor.
21st August 2013
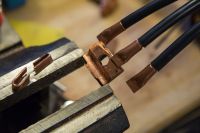
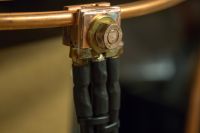
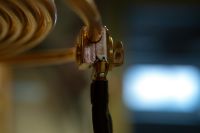
Construction of primary tap. It is made from a old clamp from mains distribution lines. 3x 35mm^2 is used.
Fall 2013
I had the same problem with my phase lead driver as Kizmo describes and troubleshoots in this thread:

Due to travelling around Europe as my job I had very little time to partake in the fault finding, Sync was kind enough to have my driver send to him and test it out. He found no problems and meanwhile the solution was found in Kizmo's thread.
Residual charge in the MMC can give the driver a false start. The solution is adding bleeder resistors to the MMC, but as we use large GTO snubber capacitors they have to have the same rating, an easy workaround is to place the bleeder resistor across the inverter output and burn the charge through the primary coil, thus the voltage rating only need to be that of the inverter output.
17th April 2014
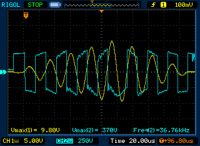
First test where the CM600 bridge is running stable was conducted. At around 270VDC it is running 1000 Apeak over 240uS ontime. Yellow trace is primary current, 500A/div and blue is inverter voltage output, 250V/div.
Static load test on a metal bucket with water in.
20th April 2014
At around 320VDC it is running 1500 Apeak over 300uS ontime. Yellow trace is primary current, 500A/div and blue is inverter voltage output, 250V/div.
12th July 2015
It has been a long while without progress, mainly due to being a small family takes time from the hobby :)
A good while also lasted to have the topload arms waterjet cutted at a reasonable price when there was a job with spare material at the cutter.
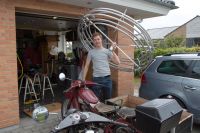
The rings was rolled on a quick mockup for a motorized tubing roller that could easily bend the soft coaxial antenna cable used.
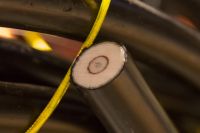
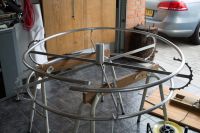
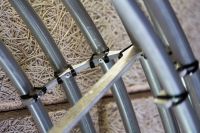
We assembled the rings and arms with rivets from the inside, unfortunately the thin walled aluminium shielding of the cable was not as strong as anticipated and it would let go of the rivets in several places, we had to cable tie it all together just so that no more would let go. Which kind of final solution we find or it will just be ties, no idea yet.
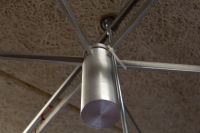
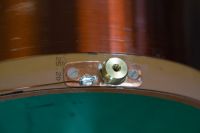
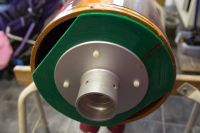
Secondary coil end terminations and topload insert mount
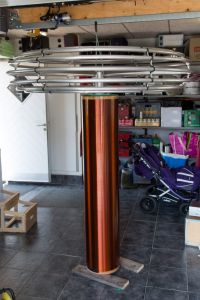
Topload sitting on top of the secondary coil
Next job to be done is finishing up the enclosure and primary coil platform, painting, mounts for putting it all on top of each other with splits, water cooling for the primary coil. :)
24th January 2016
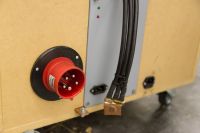
A 32A CEE plug is used for 3 phase mains input connection, we only used the plug itself and made a custom fitting for it.
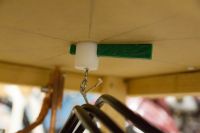
The split that holds the secondary in place.
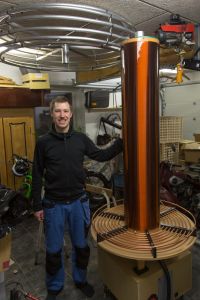
Coiler and coil :)
Test setup outside of the garage
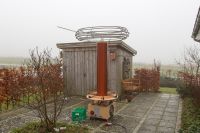
First light test and it was unfortunately under horrible conditions. We finished all the cabling and other small parts, bits and missing stuff in a days hectic work that lasted all night. So we missed the opportunity of testing in darkness.
There was no tuning performed due to lack of time, input was limited by a smaller 6A variac, BPS was kept down for the same reason, it was broad day light, foggy and wet day, the coil was just pushed outside of the garage and no cables was long enough to get it further away from the tree/house.
Sparks are about 60-70 cm and we killed the LED christmas light chain that was in the tree, it was unplugged before we started, but left the LEDs black rather than clear white.
31st March 2016
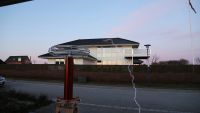
Like the first test, we were once again only able to test in the early evening due to noise in the neighborhood.
There was no tuning performed due to lack of time.
The big surprise was however that we ran on the same 6A 3 phase variac as last time, and it did not heat/or scream one bit from the runs shown in the video + a handful more.
The supply for the variac is only a 3x400VAC fused at 16A, the OCD set at 1500A never tripped even once, running BPS up to 350, 200uS on-time and ground strikes. Power meter gave an average of 0.75 power factor for our total runs.
This was a triumph!
I'm making a note here:
Huge success!
It's hard to overstate
my satisfaction.
10th September 2016
I have cut out the bonding wires to the RTC circuit of the CM600-24FA IGBT bricks, which we thought could be one of the reasons that we were not able to trip the 1500 A OCD setting. While it might have limited the operation a little bit, it was nowhere near hindering performance, this coil is just so high impedance that it runs long on-times instead of high peak currents.
Fed with 3x400VAC through a variac resulted in a 0.6 power factor. After roughly 8-10 test runs at up to 2 minutes, with peak power consumption hitting 14 kW at 500 BPS, 200uS, the total power consumption over all the tests was 0.281 kW/h, 0.331 kVAr/h and 0.481 kVA/h.
Heating up a 3 mm iron plate with some high BPS
Playing a MIDI, Bach - Tocatta Fugue, on the 3 mm iron plate
Full power, all that we could pull from the wall and let it run, 120-500 BPS at 200 to 300 uS on-time. Peak consumption is again around 14 kW.
Re: Kaizer DRSSTC III
Wolfram, Thu Jan 19 2012, 06:06PM
Don't do this unless you already have the capacitors. They are simply way off for big DRSSTCs, with way too much peak current handling capacity in relation to the capacitance and RMS voltage rating. What I mean is, if you design it for the RMS voltage handling you need, the RMS and peak current ratings will be many times what you need. Which isn't a problem in itself, but the current handling is what you're paying for with these caps. So you will end up with a cap bank costing thousands of dollars if you want a sensible voltage rating. You can always exceed the datasheet voltage rating, but you'll sacrifice reliability and still pay more than if you chose some more suited caps to begin with (and then you won't even have to exceed any of the ratings).
Many standard metallized polypropylene film caps will work fine in big DRSSTCs, some people state that only the 942C series are good enough for TCs, but this is in cases where the caps are pushed so far beyond their ratings that it's a wonder they survive at all. The wonderfull thing about large DRSSTCs, especially low impedance ones, is that a proper MMC can be made for not very much money if you chose the right caps. You can even design the MMC so that you don't have to exceed ANY datasheet ratings without it costing a fortune, and reliability will be guaranteed.
Look at the biggest DRSSTCs, most of them use other capacitors than 942Cs.
Edit: forgot to mention, very nice work. Looks solid.
Wolfram, Thu Jan 19 2012, 06:06PM
Mads Barnkob wrote ...
MMC: Cornell Dubilier (CDE) 942C20P15K-F
MMC: Cornell Dubilier (CDE) 942C20P15K-F
Don't do this unless you already have the capacitors. They are simply way off for big DRSSTCs, with way too much peak current handling capacity in relation to the capacitance and RMS voltage rating. What I mean is, if you design it for the RMS voltage handling you need, the RMS and peak current ratings will be many times what you need. Which isn't a problem in itself, but the current handling is what you're paying for with these caps. So you will end up with a cap bank costing thousands of dollars if you want a sensible voltage rating. You can always exceed the datasheet voltage rating, but you'll sacrifice reliability and still pay more than if you chose some more suited caps to begin with (and then you won't even have to exceed any of the ratings).
Many standard metallized polypropylene film caps will work fine in big DRSSTCs, some people state that only the 942C series are good enough for TCs, but this is in cases where the caps are pushed so far beyond their ratings that it's a wonder they survive at all. The wonderfull thing about large DRSSTCs, especially low impedance ones, is that a proper MMC can be made for not very much money if you chose the right caps. You can even design the MMC so that you don't have to exceed ANY datasheet ratings without it costing a fortune, and reliability will be guaranteed.
Look at the biggest DRSSTCs, most of them use other capacitors than 942Cs.
Edit: forgot to mention, very nice work. Looks solid.
Re: Kaizer DRSSTC III
Mads Barnkob, Sat May 19 2012, 06:51PM
Finally it is time for an update on this project, read it all in the first post of the thread! All the detailed construction pictures can found on my website.
Thanks and I am well aware that the 942C is less ideal for a large DRSSTC, but money rules in some of the decisions. I have looked at multiply alternatives with snubber caps, large mica caps from transmitters etc. all would be many times more expensive than buy the few more 942Cs I would need.
Mads Barnkob, Sat May 19 2012, 06:51PM
Finally it is time for an update on this project, read it all in the first post of the thread! All the detailed construction pictures can found on my website.
Wolfram wrote ...
Don't do this unless you already have the capacitors. They are simply way off for big DRSSTCs, with way too much peak current handling capacity in relation to the capacitance and RMS voltage rating. What I mean is, if you design it for the RMS voltage handling you need, the RMS and peak current ratings will be many times what you need. Which isn't a problem in itself, but the current handling is what you're paying for with these caps. So you will end up with a cap bank costing thousands of dollars if you want a sensible voltage rating. You can always exceed the datasheet voltage rating, but you'll sacrifice reliability and still pay more than if you chose some more suited caps to begin with (and then you won't even have to exceed any of the ratings).
Many standard metallized polypropylene film caps will work fine in big DRSSTCs, some people state that only the 942C series are good enough for TCs, but this is in cases where the caps are pushed so far beyond their ratings that it's a wonder they survive at all. The wonderfull thing about large DRSSTCs, especially low impedance ones, is that a proper MMC can be made for not very much money if you chose the right caps. You can even design the MMC so that you don't have to exceed ANY datasheet ratings without it costing a fortune, and reliability will be guaranteed.
Look at the biggest DRSSTCs, most of them use other capacitors than 942Cs.
Edit: forgot to mention, very nice work. Looks solid.
Mads Barnkob wrote ...
MMC: Cornell Dubilier (CDE) 942C20P15K-F
MMC: Cornell Dubilier (CDE) 942C20P15K-F
Don't do this unless you already have the capacitors. They are simply way off for big DRSSTCs, with way too much peak current handling capacity in relation to the capacitance and RMS voltage rating. What I mean is, if you design it for the RMS voltage handling you need, the RMS and peak current ratings will be many times what you need. Which isn't a problem in itself, but the current handling is what you're paying for with these caps. So you will end up with a cap bank costing thousands of dollars if you want a sensible voltage rating. You can always exceed the datasheet voltage rating, but you'll sacrifice reliability and still pay more than if you chose some more suited caps to begin with (and then you won't even have to exceed any of the ratings).
Many standard metallized polypropylene film caps will work fine in big DRSSTCs, some people state that only the 942C series are good enough for TCs, but this is in cases where the caps are pushed so far beyond their ratings that it's a wonder they survive at all. The wonderfull thing about large DRSSTCs, especially low impedance ones, is that a proper MMC can be made for not very much money if you chose the right caps. You can even design the MMC so that you don't have to exceed ANY datasheet ratings without it costing a fortune, and reliability will be guaranteed.
Look at the biggest DRSSTCs, most of them use other capacitors than 942Cs.
Edit: forgot to mention, very nice work. Looks solid.
Thanks and I am well aware that the 942C is less ideal for a large DRSSTC, but money rules in some of the decisions. I have looked at multiply alternatives with snubber caps, large mica caps from transmitters etc. all would be many times more expensive than buy the few more 942Cs I would need.
Re: Kaizer DRSSTC III
Mads Barnkob, Thu Nov 15 2012, 09:52AM
Time passes by and a lot of things have changed and not so much have been built :)
I have upgraded the planned CM300 brigde to CM600 as I came by some reasonble priced ones.
Material for the 7 ring topload was found incredible cheap.
MMC have been upgraded from 96 pieces of CDE942C capacitors to a massive GTO snubber capacitor mmc consisting of 5 in series 4uF/3kV/5kA peak capacitors.
Bridge is finished and need only gate boards and GDT mounted. Next up is getting the driver board done, tested and bridge testing can begin.
As always all pictures can be seen here:

Re: Kaizer DRSSTC III
Bennem, Thu Nov 15 2012, 11:56AM
Very nice work!
love your construction pictures too.
All these large DRSSTCs just make me wanna build one.
just need a little thing called 'funds'.....lol
All the best with your continued build and look forward to seeing its sparks.
Mel.
Bennem, Thu Nov 15 2012, 11:56AM
Very nice work!
love your construction pictures too.
All these large DRSSTCs just make me wanna build one.
just need a little thing called 'funds'.....lol
All the best with your continued build and look forward to seeing its sparks.
Mel.
Re: Kaizer DRSSTC III
Mads Barnkob, Tue May 28 2013, 01:39PM
Time flies by and the work done is little compared against the time line, but I shall get there some day!
Main post updated with pictures and rest is to be found on my site.
Mads Barnkob, Tue May 28 2013, 01:39PM
Time flies by and the work done is little compared against the time line, but I shall get there some day!
Main post updated with pictures and rest is to be found on my site.
Re: Kaizer DRSSTC III
Mads Barnkob, Thu Apr 17 2014, 07:03PM
Main thread have been updated with fault finding explanation, primary tap construction and static test of inverter.
Mads Barnkob, Thu Apr 17 2014, 07:03PM
Main thread have been updated with fault finding explanation, primary tap construction and static test of inverter.
Re: Kaizer DRSSTC III
Mads Barnkob, Wed Jul 15 2015, 05:30AM
Updated main post at the top with new progress from 12th July 2015 :)
Mads Barnkob, Wed Jul 15 2015, 05:30AM
Updated main post at the top with new progress from 12th July 2015 :)
Re: Kaizer DRSSTC III
Intra, Thu Jul 16 2015, 11:50AM
Hi Mads,
Good job!
Looks like upper copper wire between coil and toroid plate are extremely tiny for current it will have. Eric Goodchild had a problem with that and he remade it from tiny wire to copper bus.
Intra, Thu Jul 16 2015, 11:50AM
Hi Mads,
Good job!
Looks like upper copper wire between coil and toroid plate are extremely tiny for current it will have. Eric Goodchild had a problem with that and he remade it from tiny wire to copper bus.
Re: Kaizer DRSSTC III
Mads Barnkob, Thu Jul 16 2015, 01:06PM
It is just the continuation of the secondary wire, it is a 0.75 mm copper wire, it is carefully put in a slit to avoid sharp edges where break out might occur. Is the secondary circuit current distribution really so that the last 30 cm of wire carries more current than other parts of the coil?
Mads Barnkob, Thu Jul 16 2015, 01:06PM
Intra wrote ...
Hi Mads,
Good job!
Looks like upper copper wire between coil and toroid plate are extremely tiny for current it will have. Eric Goodchild had a problem with that and he remade it from tiny wire to copper bus.
Thank you Intra.Hi Mads,
Good job!
Looks like upper copper wire between coil and toroid plate are extremely tiny for current it will have. Eric Goodchild had a problem with that and he remade it from tiny wire to copper bus.
It is just the continuation of the secondary wire, it is a 0.75 mm copper wire, it is carefully put in a slit to avoid sharp edges where break out might occur. Is the secondary circuit current distribution really so that the last 30 cm of wire carries more current than other parts of the coil?
Re: Kaizer DRSSTC III
Mads Barnkob, Wed Jan 27 2016, 01:06PM
Updated first post with progress of the coil and video from first light test.
Mads Barnkob, Wed Jan 27 2016, 01:06PM
Updated first post with progress of the coil and video from first light test.
Re: Kaizer DRSSTC III
Mads Barnkob, Fri Apr 01 2016, 07:06PM
Updated main post with first full power light and MIDI playback, also the surprisingly low power usage.
Mads Barnkob, Fri Apr 01 2016, 07:06PM
Updated main post with first full power light and MIDI playback, also the surprisingly low power usage.
Re: Kaizer DRSSTC III
Vale, Sat Apr 02 2016, 11:15AM
Night shot would have been awesome, looks cool anyway.
Vale, Sat Apr 02 2016, 11:15AM
Night shot would have been awesome, looks cool anyway.
Re: Kaizer DRSSTC III
Mads Barnkob, Sat Apr 02 2016, 11:54AM
Our main priority is also finding a large place indoors where we are in much better control of everything. We just wanted to get a video of sparks of atleast 3 meters and use that with a few contacts we have to show off what kind of equipment it is and see if we can find a mutual advantage of us getting housing and they can use it in education, still operated by me of course.
Only time will tell :) Other option is that my little family and I move to a house with a big work shop, which is also within a years plan or so.
Mads Barnkob, Sat Apr 02 2016, 11:54AM
Vale wrote ...
Night shot would have been awesome, looks cool anyway.
Night shot would have been awesome, looks cool anyway.
Our main priority is also finding a large place indoors where we are in much better control of everything. We just wanted to get a video of sparks of atleast 3 meters and use that with a few contacts we have to show off what kind of equipment it is and see if we can find a mutual advantage of us getting housing and they can use it in education, still operated by me of course.
Only time will tell :) Other option is that my little family and I move to a house with a big work shop, which is also within a years plan or so.
Re: Kaizer DRSSTC III
Mads Barnkob, Sun Sept 11 2016, 08:22PM
Updated main thread with 3 new videos, recorded after removing real-time current control from the IGBT bricks.
Mads Barnkob, Sun Sept 11 2016, 08:22PM
Updated main thread with 3 new videos, recorded after removing real-time current control from the IGBT bricks.
Re: Kaizer DRSSTC III
Uspring, Mon Sept 12 2016, 10:40AM
Mads wrote:
Uspring, Mon Sept 12 2016, 10:40AM
Mads wrote:
I have cut out the bonding wires to the RTC circuit of the CM600-24FA IGBT bricks, which we thought could be one of the reasons that we were not able to trip the 1500 A OCD setting. While it might have limited the operation a little bit, it was nowhere near hindering performance, this coil is just so high impedance that it runs long on-times instead of high peak currents.Did you try detuning the coil somewhat? That should shift the primary current max if limited by secondary loading a bit up. I believe lowering primary res frequency by increasing primary inductance is preferable to adding primary capacitance.
Re: Kaizer DRSSTC III
Mads Barnkob, Mon Sept 12 2016, 10:47AM
As it is tapped at exactly where javatc predicts, there certainly is room for lowering the primary frequency.
There are so many things we want to try, experiment with, measure etc, but we have had so bad luck in getting time to run it, this time we was shut down by a neighbor noise complaint after 20 minutes of testing. So we are now looking for a new place to run it and is on break until we have that :(
Mads Barnkob, Mon Sept 12 2016, 10:47AM
Uspring wrote ...
Mads wrote:
Mads wrote:
I have cut out the bonding wires to the RTC circuit of the CM600-24FA IGBT bricks, which we thought could be one of the reasons that we were not able to trip the 1500 A OCD setting. While it might have limited the operation a little bit, it was nowhere near hindering performance, this coil is just so high impedance that it runs long on-times instead of high peak currents.Did you try detuning the coil somewhat? That should shift the primary current max if limited by secondary loading a bit up. I believe lowering primary res frequency by increasing primary inductance is preferable to adding primary capacitance.
As it is tapped at exactly where javatc predicts, there certainly is room for lowering the primary frequency.
There are so many things we want to try, experiment with, measure etc, but we have had so bad luck in getting time to run it, this time we was shut down by a neighbor noise complaint after 20 minutes of testing. So we are now looking for a new place to run it and is on break until we have that :(
Re: Kaizer DRSSTC III
Uspring, Mon Sept 12 2016, 03:16PM
I met a guy showing a rather big coil at the Nottingham Gaussfest. Inside the hall it was permanently arcing to the walls and ceiling. So I asked him, how long the sparks would be if it were run outside. He told me, he doesn't know. He never had an opportunity to do this.
We should collect some money to offer a prize to the inventor of a TC muffler.
Re: Kaizer DRSSTC III
Finn Hammer, Mon Sept 12 2016, 03:32PM
Congratulations on this test run.
Try to get access to an electrical outlet in an industrial area, where neighbours is not a problem. Here at 56 degrees north, this time of the year is perfect for outside tuning, since darkness falls at 20 hours.
Better would be an old hangar, but that is hard to come by.
We need 6-7 meters to the ceiling.
Cheers, Finn Hammer
Print this page