If you need assistance, please send an email to forum at 4hv dot org. To ensure your email is not marked as spam, please include the phrase "4hv help" in the subject line. You can also find assistance via IRC, at irc.shadowworld.net, room #hvcomm.
Support 4hv.org!
Donate:
4hv.org is hosted on a dedicated server. Unfortunately, this server costs and we rely on the help of site members to keep 4hv.org running. Please consider donating. We will place your name on the thanks list and you'll be helping to keep 4hv.org alive and free for everyone. Members whose names appear in red bold have donated recently. Green bold denotes those who have recently donated to keep the server carbon neutral.
Special Thanks To:
Aaron Holmes
Aaron Wheeler
Adam Horden
Alan Scrimgeour
Andre
Andrew Haynes
Anonymous000
asabase
Austin Weil
barney
Barry
Bert Hickman
Bill Kukowski
Blitzorn
Brandon Paradelas
Bruce Bowling
BubeeMike
Byong Park
Cesiumsponge
Chris F.
Chris Hooper
Corey Worthington
Derek Woodroffe
Dalus
Dan Strother
Daniel Davis
Daniel Uhrenholt
datasheetarchive
Dave Billington
Dave Marshall
David F.
Dennis Rogers
drelectrix
Dr. John Gudenas
Dr. Spark
E.TexasTesla
eastvoltresearch
Eirik Taylor
Erik Dyakov
Erlend^SE
Finn Hammer
Firebug24k
GalliumMan
Gary Peterson
George Slade
GhostNull
Gordon Mcknight
Graham Armitage
Grant
GreySoul
Henry H
IamSmooth
In memory of Leo Powning
Jacob Cash
James Howells
James Pawson
Jeff Greenfield
Jeff Thomas
Jesse Frost
Jim Mitchell
jlr134
Joe Mastroianni
John Forcina
John Oberg
John Willcutt
Jon Newcomb
klugesmith
Leslie Wright
Lutz Hoffman
Mads Barnkob
Martin King
Mats Karlsson
Matt Gibson
Matthew Guidry
mbd
Michael D'Angelo
Mikkel
mileswaldron
mister_rf
Neil Foster
Nick de Smith
Nick Soroka
nicklenorp
Nik
Norman Stanley
Patrick Coleman
Paul Brodie
Paul Jordan
Paul Montgomery
Ped
Peter Krogen
Peter Terren
PhilGood
Richard Feldman
Robert Bush
Royce Bailey
Scott Fusare
Scott Newman
smiffy
Stella
Steven Busic
Steve Conner
Steve Jones
Steve Ward
Sulaiman
Thomas Coyle
Thomas A. Wallace
Thomas W
Timo
Torch
Ulf Jonsson
vasil
Vaxian
vladi mazzilli
wastehl
Weston
William Kim
William N.
William Stehl
Wesley Venis
The aforementioned have contributed financially to the continuing triumph of 4hv.org. They are deserving of my most heartfelt thanks.
Registered Member #33460
Joined: Tue Aug 27 2013, 06:23PM
Location: Seattle
Posts: 46
I was referring to high voltage collector combs, not the neutralizers. I use the terms brush/comb interchangeably, since either could really be either.
A search of images of Wimshurst machines will reveal that many do not cover the whole breadth of the sector with the high voltage collector. Some use a soft brush in contact with the disc, some use sharp pointed tines of a comb that do not touch the disc.
Registered Member #834
Joined: Tue Jun 12 2007, 10:57PM
Location: Brazil
Posts: 644
AwesomeMatt wrote ...
In the previous post, the end caps for the 5/8" tubing, will that work? I'm not actually sure how to terminate the pipes. I've seen brass balls and stuff, is that too ugly/sharp? Do they need to be spheres?
Will the tubing be enough for the neutralizer bar and comb supports? I was planning on only using the 1" straight pipe for the output rods.
Do the combs actually touch the wheel? Some people said no, but in the tabletop one they do. In the tabletop one both the brushes and combs are made out of solder wick. I was thinking of using photocopier destatic brushes, hovering just barely.
Are the Leyden Jars connected to each other? I think the outer conductor is connected in common?
How thick do my Leyden insulators need to be? I was hoping to use just 4-6" PVC tube, cut however long. So, that stuff is.. I dunno, 1/8"-1/4" thick.
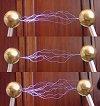
For a very high voltage machine, no sharp corner or end in the conductors can exist. An assembly of balls and tubes works well. The balls can be made of wood, as said, with the tubes in contact inside them.
The neutralizer brushes must touch the disks, lightly but with good contact, or the machine does not start. The charge collectors don't have to touch the disks.
The outer plates of the Leyden jars are in contact. I like to put a secondary spark gap between them. High-voltage pulses appear there when the main terminals spark.
The jars must be thick. About 4-5 mm, probably, is enough. Two jars in series can be used for greater insulation, one inside the other. With tubes you need to close the bottom, what is almost impossible, or just leave a margin as great as in the other direction, with the internal and external plates at the center.
Those nice ceramic insulators can be used in the assembly, if you find how to fix them to other parts.
About mounting the disks on the uper axle, I use a single steel axle, with two ball bearings at each of the bosses, with the disks fixed to the bosses with three flat-head screws. Metal disks can be used at the inner side to avoid stressing the disks, and rubber spacers between the disks and the bosses, allowing some adjustment of the verticality of the disks by the pressure of the screws. I make first the holes in the disks with the exact size of the axle, and once everything is aligned and the screws fixed, I enlarge a bit the hole so only the bearings touch the axle. To obtain uniform flat disks in acrylic is not easy. Select the plates when buying them, looking for flatness and uniform thickness.
Registered Member #4454
Joined: Sun Feb 26 2012, 12:47AM
Location: Western Canada
Posts: 74
wrote ... Some use a soft brush in contact with the disc, some use sharp pointed tines of a comb that do not touch the disc.
I've seen both styles yes. It's the one piece of the machine I don't really understand how or why it works. How they pick up voltage and what they do.
I've seen the pointed tines, I wondered if they are supposed to be sharp on purpose, or if they should be blunted. Or if actual contacting brushes are easier.
I like the idea of combs simply because, visually, it's different and easier to explain that they have a different purpose.
Today's Progress:
- Got the ugly 2x4 frame and MDF baseplate complete - Settled on an acrylic thickness at the shop (3/16", 4.75mm) - Settled on height, drilled out the wheel axle (upper) mount - Mounted the crank pillow block bearings for the (lower) crank - Drilled and bolted the 6" pulleys to the 12" ones (12" ones needed some way to afix to the shaft, 6" were bought earlier and were supposed to be returned but under time crunch I'm using those pulleys just as a collar with a set screw). - Arranged for one friend to lasercut the giant wheels at the local hackerspace. - Arranged for someone else to use the big CNC Shopbot router to cut the wheels, as a backup plan. - Figured out a mounting method for the big discs to the little pulleys to the upper axle, and for someone to help lathe the discs (little pulleys are steel, not cast iron, meaning they can be welded, so I'll weld a disc to them, which bolts to the shaft). - Ordered and rush shipped 4x 5" and 4x 2.75" spheres (thanks Eleccentric for the tip!), it arrives tomorrow. - Ordered and rush shipped Homemade Lightning book, arrives tomorrow.
My philosophy is that the only tangible reward people get for taking time out of their day to help me, is seeing that their help made a difference. So as promised, I'm making a best effort to document the build in as interesting a way as possible.
Here are the pics I didn't take yesterday. The 6" pulleys ($15 each?) used as collars, bolted to the 12" plastic pulleys (machinable plastic? From some coathangered exhibit).
And the frame as of last night:
Ghetto mounted pillow block bearings ($6 each?). I will have to go back later and bolt them down properly somehow. Or not, it's just a prototype.
Closeup of the large pulleys.
And today's work begins! Lower drive assembly is complete today. A couple pics of it mounted and a handle attached.
That took me a couple hours. The axle did *not* want to go into those bearings. I don't get it, they say "China" right on them, a country world famous for its craftsmanship!
I ended up slightly bending the 1/2" axle trying to hammer it on there with a rubber hammer on a 2x2. Nope. Out comes the 20 ton shop press. Oops, I did it wrong about 1/4 of the way in, flip it around, press it out, start the other way and continue. Took a while to tweak the spacing even preliminarily.
The handle was meant for a 3/4" shaft. It has a set screw, so, some masking tape is working magnificently as a cylindrical shim:
After trying a scribe on a swingarm (worked well but slow), a laminate cutter on another swing arm (melted where I paused to change my grip) earlier this week with moderate success on sample pieces... the 3/8" acrylic arrived today and it was time to put the shopbot to use because computers are faster, right?
2 hours later, we got it to cut (8 minutes total cut time). Had to manually play with some G-code to get it to avoid the center where we bolted that big plate. Took a while to jig up. First time we tried cutting at 6" per second which snapped the bit after a foot. 1" per second with the new bit. Videoed this for later.
Some to-be-repurposed PVC for Leyden jars, maybe, if that's what works.
The gazing globes arrived. I ordered a string of 8 (4 medium 4 small), so they have small holes in them. Bonus! This will help me align them for mounting. Only the tip will need to be filled with a finishing nail ground smooth or something. 5" and 2.75", on a 1" pipe (just laid out, not mounted):
Rollin' rollin' rollin', let's get those big wheels goin'! H'yah!
Registered Member #834
Joined: Tue Jun 12 2007, 10:57PM
Location: Brazil
Posts: 644
Imagining how you will fix the small ball to the larger one. I would try to avoid solder, but this is an option. The frame seems be too close to the disks. They will spark to the frame close to the neutralizers, if they are set at a high angle. Why the double pulleys below?
Registered Member #72
Joined: Thu Feb 09 2006, 08:29AM
Location: UK St. Albans
Posts: 1659
To reinforce Antonio's point. At the voltages and currents involved here, wood is a conductor. If you do a google images search for Wimshurst machines, they *all* have a thin vertical frame that follows the zero potential region up the middle of the discs. The voltage increases to each side of the discs, becoming maximum where the takeoff combs are located. Any significant width on a frame will tend to short out the two sides if it is too close to the sectors.
You may want to rebuild your frame now, so that the diagonal elements become mere corner braces at the bottom, not overlapping the discs, rather than reaching up all the way to the axle. Obviously that's not going to be as stiff as you have at the moment. Then again, you might want to continue this build as is, to get your feet wet, learn whatever else you can at the same time, bearing in mind the sort of rebuild that might be needed next.
Registered Member #3414
Joined: Sun Nov 14 2010, 05:05PM
Location: UK
Posts: 4245
Antonio wrote ...
Imagining how you will fix the small ball to the larger one. I would try to avoid solder, but this is an option.
I was thinking more for joining the sphere to the copper tube. It is tricky soldering stainless but it can be done.
I've no idea how to join the two spheres, other than drilling two opposing holes in one, and soldering/welding some threaded bar onto the other, passing the threaded bar all the way through both holes in the other, and securing with a nut, and then mounting the sphere with two holes in so that the nut is inside the copper tube. (I can provide a simple sketch if clarification is required.
Registered Member #33460
Joined: Tue Aug 27 2013, 06:23PM
Location: Seattle
Posts: 46
A thought on the material making the frame: perhaps composite decking boards would be an affordable and much less conductive alternative to wood. I'm not certain of their composition, but it appears to be some sort of easily machinable plastic.
I suppose it would also be possible to braze the stainless spheres together, but it would have to be cleaned up afterward with files followed by progressively finer sandpaper to get back to a nicely smooth surface.
Registered Member #4454
Joined: Sun Feb 26 2012, 12:47AM
Location: Western Canada
Posts: 74
wrote ... The frame seems be too close to the disks. They will spark to the frame close to the neutralizers, if they are set at a high angle.
Hrm. Crap. I was mostly just scared of 100 pounds of counter-rotating flywheels not being braced like hell.
wrote ... Why the double pulleys below?
I had it in my comments... From the first place I went, 6" was the max. Then I found the 12" pulleys in the shop, but they were just bare plastic pulleys, no way to mount them. Since time is an issue, I just bolted the 6" pulleys to the 12" ones because the 6" ones had a set screw.
So, they 6" don't do anything other than afix the 12" pulleys to the shaft. And.. if needed, I could actually use them I suppose, if I wanted a 2x smaller ratio.
wrote ... Any significant width on a frame will tend to short out the two sides if it is too close to the sectors.
I knew this, sort of. It's the reason I rejected plywood or MDF wheels. But I chose to build it this way anyway. I thought it would be a small issue (wood isn't *that* conductive). I see I was wrong.
Again, I was scared of the flywheel energies.
wrote ... You may want to rebuild your frame now, so that the diagonal elements become mere corner braces at the bottom, not overlapping the discs, rather than reaching up all the way to the axle. Obviously that's not going to be as stiff as you have at the moment. Then again, you might want to continue this build as is, to get your feet wet, learn whatever else you can at the same time,
No time to build multiple versions. The need to know if it's a doable project by Friday (working prototype) or they pull the plug and go with something lamer and less challenging (Jacob's Ladder or somesuch).
It's the centerpiece/showpiece of an 8-exhibit electrical thing. The other exhibits you learn things, this is to wow and get people talking.
So, what I will do is mount the wheels and crank them up to speed, get a feel for what gearing is reasonable. When I see what the rigidity is like, I will do as you suggested and chop the diagonals way down to corner braces and see how unstable it gets.
The A-frame is actually almost 4" tall (the upper axle is near the top) specifically so I had lots of wiggle room, so I could still have diagonals going 2' up instead of all 4.
Another thing I will/could do is space the frame out farther on the axles. There is maybe 6" of room between the A-frames, the axles are 18" long. The base is I think 30" wide, so, lots of play room there. The A-frames are built as individual units first, then mounted to the platform, so, moving them is as simple as changing 4 screws.
wrote ... I've no idea how to join the two spheres, other than drilling two opposing holes in one, and soldering/welding some threaded bar onto the other, passing the threaded bar all the way through both holes in the other, and securing with a nut, and then mounting the sphere with two holes in so that the nut is inside the copper tube.
I understood. I may do this.
Or, I may TIG weld a metal screw onto the bottom of the small one and just thread it right onto the big one. Maybe squirt some JBweld into the hole on the big one before I screw into it and then let the JB weld add some internal support (let it cure upside down so the epoxy cures against the screw inside the ball. The walls are very thin.
Maybe I'll just drill a hole, weld a nut sort of flush, and a bolt to the other globe and screw them in. It's basically the method I'm using to fix the globes to the copper shaft, only I don't have access to the opposite side of the shaft.
wrote ... perhaps composite decking boards would be an affordable and much less conductive alternative to wood
Well if it comes down to it, there's lots of scrap acrylic sitting around.
Nylon rope tethered and tensioned to the peaks and corners instead of the diagonal braces could work too I think.
...
Not much of an update today, was busy doing other things. Homemade Lightning arrived, and I did a couple hours of shopping for plumbing fixtures to solder the copper tubing together.
Thank you all for the continual support, feedback, criticism and interest. Seems every time I get frustrated with an indecision or roadblock someone in the community has come to my rescue.
Registered Member #3414
Joined: Sun Nov 14 2010, 05:05PM
Location: UK
Posts: 4245
Just a tip, if you do try TIG welding the spheres, I'd drill them and add a supply of argon to the inside, otherwise you'll probably have some problems.
This site is powered by e107, which is released under the GNU GPL License. All work on this site, except where otherwise noted, is licensed under a Creative Commons Attribution-ShareAlike 2.5 License. By submitting any information to this site, you agree that anything submitted will be so licensed. Please read our Disclaimer and Policies page for information on your rights and responsibilities regarding this site.


 Giant Wimshurst Machine - could use some guidance