If you need assistance, please send an email to forum at 4hv dot org. To ensure your email is not marked as spam, please include the phrase "4hv help" in the subject line. You can also find assistance via IRC, at irc.shadowworld.net, room #hvcomm.
Support 4hv.org!
Donate:
4hv.org is hosted on a dedicated server. Unfortunately, this server costs and we rely on the help of site members to keep 4hv.org running. Please consider donating. We will place your name on the thanks list and you'll be helping to keep 4hv.org alive and free for everyone. Members whose names appear in red bold have donated recently. Green bold denotes those who have recently donated to keep the server carbon neutral.
Special Thanks To:
Aaron Holmes
Aaron Wheeler
Adam Horden
Alan Scrimgeour
Andre
Andrew Haynes
Anonymous000
asabase
Austin Weil
barney
Barry
Bert Hickman
Bill Kukowski
Blitzorn
Brandon Paradelas
Bruce Bowling
BubeeMike
Byong Park
Cesiumsponge
Chris F.
Chris Hooper
Corey Worthington
Derek Woodroffe
Dalus
Dan Strother
Daniel Davis
Daniel Uhrenholt
datasheetarchive
Dave Billington
Dave Marshall
David F.
Dennis Rogers
drelectrix
Dr. John Gudenas
Dr. Spark
E.TexasTesla
eastvoltresearch
Eirik Taylor
Erik Dyakov
Erlend^SE
Finn Hammer
Firebug24k
GalliumMan
Gary Peterson
George Slade
GhostNull
Gordon Mcknight
Graham Armitage
Grant
GreySoul
Henry H
IamSmooth
In memory of Leo Powning
Jacob Cash
James Howells
James Pawson
Jeff Greenfield
Jeff Thomas
Jesse Frost
Jim Mitchell
jlr134
Joe Mastroianni
John Forcina
John Oberg
John Willcutt
Jon Newcomb
klugesmith
Leslie Wright
Lutz Hoffman
Mads Barnkob
Martin King
Mats Karlsson
Matt Gibson
Matthew Guidry
mbd
Michael D'Angelo
Mikkel
mileswaldron
mister_rf
Neil Foster
Nick de Smith
Nick Soroka
nicklenorp
Nik
Norman Stanley
Patrick Coleman
Paul Brodie
Paul Jordan
Paul Montgomery
Ped
Peter Krogen
Peter Terren
PhilGood
Richard Feldman
Robert Bush
Royce Bailey
Scott Fusare
Scott Newman
smiffy
Stella
Steven Busic
Steve Conner
Steve Jones
Steve Ward
Sulaiman
Thomas Coyle
Thomas A. Wallace
Thomas W
Timo
Torch
Ulf Jonsson
vasil
Vaxian
vladi mazzilli
wastehl
Weston
William Kim
William N.
William Stehl
Wesley Venis
The aforementioned have contributed financially to the continuing triumph of 4hv.org. They are deserving of my most heartfelt thanks.
Registered Member #1938
Joined: Sun Jan 25 2009, 12:44PM
Location: Romania
Posts: 701
Here's a short guide on how to build a disc-shaped flyback secondary, to overcome some of the well known issues: - the huge potential difference between turns placed at only a few millimeters apart: a risk for arcs - if winding the secondary on separated layers, the insulation between these should hold the high voltages, corona should be prevented, and the capacitance between layers should be minimized. - winding the flyback secondary takes considerable time if done manually, since the turns need to be made carefully one near another to reduce air in between, to save space, and to ensure the insulation is uniformly distributed.
The article is also available here:
How to build (a good) Flyback seconday
You will need: - PVC pipe, wide enough to fit the Ferrite core. The pipe's internal diameter should match the feritte's external diameter, so it would be fixed on it. - Epoxy - you will need like 20+20g for a 6cm diameter disc flyback like the one pictured above - Wire for winding the secondary - Small DC motor with variable power supply to adjust the motor speed - cardboard - green house foil (I used UV resistant foil) - polyethylene plastic sheet - paper glue (not very strong!)
Step 1 Start by drawing two circles on the cardboard. The diameter you choose will be the diameter of your flyback disc. Mine were 6 cm diameter (check your ferrite core first, make sure the secondary disc will fit). Inside each circle, draw a smaller concentric circle, with the diameter a little bit smaller then the exterior diameter of your PVC pipe (you'll need to force fit the cardboard discs on the PVC pipe). Put some paper glue over the cardboard inside the two circles. You can apply glue only over the circumference. Cover the cardboard with a piece of green house foil, make sure it adheres to the glued area (press it carefully).
Step 2 Cut the two discs out, make sure the foil remains fixed on the cardboard (the glue will hold it but won't stick to it), then using a sharp cutter, cut out the inner circle. Take your PVC pipe and carefully force it through the discs. Make sure the two discs are facing each other with the foil covered face. In between you will form the secondary disc, using wire and epoxy, and at the end you will need to take the cardboard discs apart. The green house foil will let you do this easily, since epoxy doesn't adhere to it. Make sure the two discs are at maximum 3mm apart! The space between must be 3mm or less. Use a small object of this size, and move it all around the space between the discs, to check the distance is uniform. When the pipe is force trough the discs a small paper formation will be pushed out at the exit end. This will help making the discs fixed on the pipe so they will not move while winding. So be careful not to make the inner circle too wide!
Step 3 Take the DC motor and cover the axis with some rubber tubing, tape or whatever you will need to increase the axis diameter to fit the PVC pipe. you will use it to rotate the PVC pipe with discs, to make the coil easily.
Step 4 Take the end of the winding wire, between the two discs, and force it out at the bottom, near the PVC pipe. You can use a needle to make some room first. You can also connect a ticker insulated wire to the thin one, and take that out. This will be the first connector of your flyback (the low potential one). Put the PVC pipe with discs and wire on the DC motor axis, add some epoxy over the Pipe and wire (between the discs) . Do not worry if the epoxy remains between the discs and doesn't get down to the Pipe surface: when winding, the wire will take it down exactly where we need it. Make sure you use plenty of epoxy, and move fast, so it doesn't solidify before you manage to make the coil turns. In one hand hold the motor and with a finger break the rotation as needed. With the other hand adjust the motor's voltage and then hold the wire and make sure it goes in between the discs. Release the finger break. Make sure the speed is not too high, or it could break your wire. Make sure the forming coil is always covered by a small quantity of epoxy. So from time to time, stop the motor, and add epoxy, then continue. Try to wind the coil uniformly (but at 3 mm gap, this will happen anyway) .
Step 5 When the coil is finished (approaching the 6cm diameter limit), connect the ending wire, and add an extra epoxy layer over the external circumference. Let it dry (in my case it needed 5 hours, read the instructions on your epoxy tubes).
Step 6 Use a toothpick or a similar non metallic sharp tool, to remove the cardboard discs. Just push the toothpick between the cardboard and the green house foil, and both will come out easily. A nice flyback secondary disc consisting of only hardened epoxy and wire remains.
Be careful about these possible mistakes - I've learned them the hard way: 1) Do not make the distance between the cardboard discs bigger then 3 mm! You risk to get turns with high potential difference in close proximity and they will arc, destroying your secondary. 3 mm space with a winding wire of 0.1 - 0.14 mm diameter is perfect. 2) Do not replace the green house foil by paper or other foil the epoxy adheres to. You won't be able to remove the discs, and the flyback will look bad (but will work ok):
Some ideas If you have plenty of space on your ferrite core, you can place 2 or 3 such secondary discs and connect them in series, but make sure the starting wire goes to the ending one of the other coil. Also make sure they are winded in the same direction. You can also place high voltage diodes, to put lesser stress on the secondaries and get DC high voltage, like it is done in modern flyback transformers.
The article, with more photos is also available here:
Registered Member #2919
Joined: Fri Jun 11 2010, 06:30PM
Location: Cambridge, MA
Posts: 652
Oh my god oh my god so beautiful! You should do it on a BIG core (e.g. the huge TSC ferrite ones) and see how much power you can push. Is it stable? Does it suffer from arcover, etc?
Registered Member #3114
Joined: Sat Aug 14 2010, 08:33AM
Location:
Posts: 608
just an idea...when i wind my flyback secondary's i use a long carriage bolt, two big washers, and two nuts, i clamp the tube in between the washers and then i use my drill to turn it.
Registered Member #1938
Joined: Sun Jan 25 2009, 12:44PM
Location: Romania
Posts: 701
LittleVenture wrote ...
just an idea...when i wind my flyback secondary's i use a long carriage bolt, two big washers, and two nuts, i clamp the tube in between the washers and then i use my drill to turn it.
Yes, that's a very good alternative, assuming you also have a quick way of turning off the drill because when winding in 3mm space, the wire can get stuck on the cardbox discs and breaking it would be bad. I wouldn't set the drill on locked-on mode, but using it manually is perfect.
This site is powered by e107, which is released under the GNU GPL License. All work on this site, except where otherwise noted, is licensed under a Creative Commons Attribution-ShareAlike 2.5 License. By submitting any information to this site, you agree that anything submitted will be so licensed. Please read our Disclaimer and Policies page for information on your rights and responsibilities regarding this site.


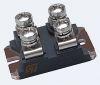
 Almost perfect homemade flyback secondary