
Laser Mounting Fun
..., Thu Oct 12 2006, 06:15AMWell I was on ebay last week and found an opportunity to get >1kw of 808nm pump diodes (for pumping Nd:YAG for a high quality 1064nm beam, or possible a block of KTP or some other non linear optic for 532nm green)--in bare chip form.
So I managed to convince McFluffin go 30/70 hoping to sell most of them back off as bare dies (at the current going rates that would be ~$7k in profit) but we (well I) plan to mount somewhere between 1 and 20 of them and possibly pump a frankenstein ssy-1 laser for some colminated (abit not tem00) 1064nm beams.
In any case, to sell the dies individually I needed gel-paks, and since my dad works at a laser manufacture he has tons of them, with one catch---they already have 10 year old laser dies in them
 So he brought home ~100 lasers that have power from 10-40mw at 1550-800nm (no idea where, they aren't marked with anything that makes sense) and a bunch of very high speed photo diodes.
So I decided to practice mounting some diodes to prepare for the bars...
Note--This is the things I did correctly, I resanded the copper block at least 10 times over the course of the afternoon after I screwed up. About 5 hours of work went into it, I bet I could fo it again in 30 minutes. We shall see tomorrow.
I started by smashing a to-220 fet to remove the plastic, then hacksawed the copper substrate off at the bottom of the hole. Then I filed it down to be about the right shape. Then I sanded the edges with 120grit paper (just eyeballing the shape). Then used 320->2/0->5mil lapping film on the faces.
Then I put a dab of solder on it, and soldered a piece of .030" pcb stock on it (to give me a place to put the wire to the cathode of the die).
Then the fun part, I heated the whole mess up to ~130C, touched it with my flux pen, and started tinning. After I got a good tin I wiped 90% of the solder off, leaving a thin layer.
Then on goes a die...
And then the wire to the cathode...
And then turn of the hotplate, and rinse with IPA (very well, don't want any flux on that diode)
Sorry no pics of the assembly process, but I didn't have my microscope cam set up, nor did I have my capture card in the right computer.
Add 2v/100ma and viola, 30mw of IR light :)
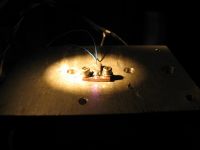
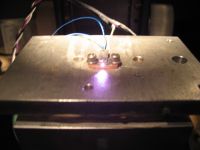
running at low power and high power
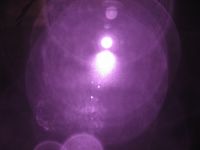
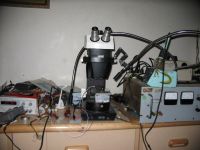
loking strait into the diode and area where I was working
 Can anyone figure out where the laser is in the last pic?
I will be posting often as things progress. I don't think this should go in the project thread as I am expecting comments/discussion and there is not a definant end to the project (yet)
Re: Laser Mounting Fun
..., Thu Oct 19 2006, 05:32AM
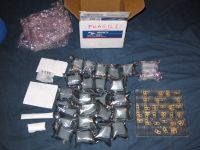
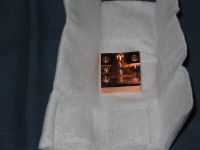
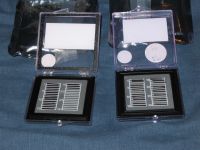
Well the dies finally came
23 ~20w bars, and 18 ~50w ones
There were also ~20 copper mounts to solder them down to, and parts of a different mount (but I have found a way to modify them to work together without looking too much like it was built by a 16 y/old)
I am now almost ready to take over the world MUHAHAHAHA
Oh, and a full week and no responses... What is with you guys! No more pics until someone says something...
..., Thu Oct 19 2006, 05:32AM
Well the dies finally came

23 ~20w bars, and 18 ~50w ones

There were also ~20 copper mounts to solder them down to, and parts of a different mount (but I have found a way to modify them to work together without looking too much like it was built by a 16 y/old)
I am now almost ready to take over the world MUHAHAHAHA


Oh, and a full week and no responses... What is with you guys! No more pics until someone says something...
Re: Laser Mounting Fun
EEYORE, Thu Oct 19 2006, 05:40AM
Neato!Are these bare laser diode chips we are talking?if so, kudos to you!Not an easy thing to do...Ive always wanted to try, but prohibitive costs of laser parts and lack of steady hands kept me from doing so...
Make sure to post some pcs of it lasing!20w ought to be nice...
Matt
Re: Laser Mounting Fun
Electroholic, Thu Oct 19 2006, 06:03AM
i thought dies are real sensitive to air/h2o?
Electroholic, Thu Oct 19 2006, 06:03AM
i thought dies are real sensitive to air/h2o?
Re: Laser Mounting Fun
Steve Conner, Thu Oct 19 2006, 12:15PM
We're all too scared to post in case you burn both your eyes out and your dad sues us.
Steve Conner, Thu Oct 19 2006, 12:15PM
We're all too scared to post in case you burn both your eyes out and your dad sues us.

Re: Laser Mounting Fun
..., Thu Oct 19 2006, 02:38PM
I have the correct googles, and will be doing most of the experiments under a video camera becuase it is too small to see with the naked eye and that whole problem of it being invisable.
I should point out now that these bars won't give a 'real' laser beam, it is actually going to look like a flat line that is made up from a bunch of small spots from each of the emitters in the bar.
That is why I hope use some of them to pump a Nd:YAG rod, as that will result in a decent single mode beam that can at least be focused down to a single spot. I have most of the parts to do this, except the 99% reflectance 1064nm mirror to use as the output coupler. I will try with another ~100% mirror first to at least prove that it is lasing, but I can't get very much power out of it that way.
Ideally I would use a l-fold cavity and have a block of KTP to double for a few wats of green, but that will require acess to a mill to mount everything.
The dies are slightly hydroscopic, however for short term that are fine out in the air. So long as you store them with a dessicant they will be fine.
BTW, those chips are HUGE compared to what I was mounting. One of those bars is a block of ~100 of the size bars I mounted the first time.
..., Thu Oct 19 2006, 02:38PM
I have the correct googles, and will be doing most of the experiments under a video camera becuase it is too small to see with the naked eye and that whole problem of it being invisable.
I should point out now that these bars won't give a 'real' laser beam, it is actually going to look like a flat line that is made up from a bunch of small spots from each of the emitters in the bar.
That is why I hope use some of them to pump a Nd:YAG rod, as that will result in a decent single mode beam that can at least be focused down to a single spot. I have most of the parts to do this, except the 99% reflectance 1064nm mirror to use as the output coupler. I will try with another ~100% mirror first to at least prove that it is lasing, but I can't get very much power out of it that way.
Ideally I would use a l-fold cavity and have a block of KTP to double for a few wats of green, but that will require acess to a mill to mount everything.

The dies are slightly hydroscopic, however for short term that are fine out in the air. So long as you store them with a dessicant they will be fine.
BTW, those chips are HUGE compared to what I was mounting. One of those bars is a block of ~100 of the size bars I mounted the first time.
Re: Laser Mounting Fun
EEYORE, Thu Oct 19 2006, 10:08PM

Check ebay for the mirrors, also try Meredith Lasers( they sell this sorta stuff). If you can find a SSY-1 laser head, you may just need to modify it some for the diode bar pumping, but they usually run $$$, i once got one for 75$ on ebay, so keep looking...
Keep us posted,
Matt
EEYORE, Thu Oct 19 2006, 10:08PM
... wrote ...
I have the correct googles, and will be doing most of the experiments under a video camera becuase it is too small to see with the naked eye and that whole problem of it being invisable.
I should point out now that these bars won't give a 'real' laser beam, it is actually going to look like a flat line that is made up from a bunch of small spots from each of the emitters in the bar.
That is why I hope use some of them to pump a Nd:YAG rod, as that will result in a decent single mode beam that can at least be focused down to a single spot. I have most of the parts to do this, except the 99% reflectance 1064nm mirror to use as the output coupler. I will try with another ~100% mirror first to at least prove that it is lasing, but I can't get very much power out of it that way.
Ideally I would use a l-fold cavity and have a block of KTP to double for a few wats of green, but that will require acess to a mill to mount everything.
The dies are slightly hydroscopic, however for short term that are fine out in the air. So long as you store them with a dessicant they will be fine.
BTW, those chips are HUGE compared to what I was mounting. One of those bars is a block of ~100 of the size bars I mounted the first time.
Also those bars will need to be colimated before they become dangerous, unless you go putting your eyeball right up to one I have the correct googles, and will be doing most of the experiments under a video camera becuase it is too small to see with the naked eye and that whole problem of it being invisable.
I should point out now that these bars won't give a 'real' laser beam, it is actually going to look like a flat line that is made up from a bunch of small spots from each of the emitters in the bar.
That is why I hope use some of them to pump a Nd:YAG rod, as that will result in a decent single mode beam that can at least be focused down to a single spot. I have most of the parts to do this, except the 99% reflectance 1064nm mirror to use as the output coupler. I will try with another ~100% mirror first to at least prove that it is lasing, but I can't get very much power out of it that way.
Ideally I would use a l-fold cavity and have a block of KTP to double for a few wats of green, but that will require acess to a mill to mount everything.

The dies are slightly hydroscopic, however for short term that are fine out in the air. So long as you store them with a dessicant they will be fine.
BTW, those chips are HUGE compared to what I was mounting. One of those bars is a block of ~100 of the size bars I mounted the first time.

Check ebay for the mirrors, also try Meredith Lasers( they sell this sorta stuff). If you can find a SSY-1 laser head, you may just need to modify it some for the diode bar pumping, but they usually run $$$, i once got one for 75$ on ebay, so keep looking...
Keep us posted,
Matt
Re: Laser Mounting Fun
..., Thu Oct 19 2006, 10:17PM
My current plan is to use a ssy-1 (I have 3 as of now), but as it is the OC has way to low of a reflectance for me to be able to get it to lase as is, so I will need to get a correct one. For testing I can replace the OC with another HR, but that won't let very much light out being like 99.99% reflectance
I have been watching ebay extreenly carefully, but have not found what I am looking for. The problem is that what I need is not a very common optic, as most HR's are designed for flashlamp pumping and thus have a low reflectance, while I need a moderatly high (~99%) one. I have been e-mailing many different suppliers and have yet to find a sutable optic.
I will also need to find a way to cool the rod, as with ~150w going in it will need some pretty massive coolling
I hope to have first light on friday
..., Thu Oct 19 2006, 10:17PM
My current plan is to use a ssy-1 (I have 3 as of now), but as it is the OC has way to low of a reflectance for me to be able to get it to lase as is, so I will need to get a correct one. For testing I can replace the OC with another HR, but that won't let very much light out being like 99.99% reflectance

I have been watching ebay extreenly carefully, but have not found what I am looking for. The problem is that what I need is not a very common optic, as most HR's are designed for flashlamp pumping and thus have a low reflectance, while I need a moderatly high (~99%) one. I have been e-mailing many different suppliers and have yet to find a sutable optic.
I will also need to find a way to cool the rod, as with ~150w going in it will need some pretty massive coolling

I hope to have first light on friday
Re: Laser Mounting Fun
..., Fri Oct 20 2006, 12:50AM
I have e-mailed casix directly with no response, however if anyone knows a distributer that will sell me a NDO0101-1064nm-98% in single unit quantities I am all ears (although I will admit that I have been swamped with homework and have not really been looking all that hard)
Re: Laser Mounting Fun
..., Sun Oct 22 2006, 08:28AM
I hope it has been 48hrs...
IT LIVES
I mounted one of my 23 ~20w 808nm bars, and fired it up at 1:03am PDT.
Setting a solar cell in front of it (very rough estimate) gave a running current of ~20 amps, and an IR card showed the threshold to be about 5 amps.
Runs were limited in length becuase it was still mounted on my small hotplate, which isn't the ideal heatsink...
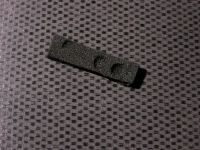
What suprised me the most was that the beam is almost round at about .5" in front of the array (the fast axis happened to have diverged 1cm; the lenght of the bar).
Some shots of the laser
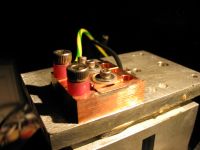
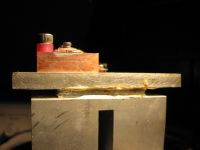
 croped version showing the bar well below threshold
Will try to give a little more info later today, need sleep
..., Sun Oct 22 2006, 08:28AM
I hope it has been 48hrs...
IT LIVES

I mounted one of my 23 ~20w 808nm bars, and fired it up at 1:03am PDT.
Setting a solar cell in front of it (very rough estimate) gave a running current of ~20 amps, and an IR card showed the threshold to be about 5 amps.
Runs were limited in length becuase it was still mounted on my small hotplate, which isn't the ideal heatsink...
What suprised me the most was that the beam is almost round at about .5" in front of the array (the fast axis happened to have diverged 1cm; the lenght of the bar).

Some shots of the laser


 croped version showing the bar well below threshold
Will try to give a little more info later today, need sleep

Re: Laser Mounting Fun
Steve Conner, Sun Oct 22 2006, 11:56AM
That's pretty impressive! What is the first picture, a piece of foam plastic burnt by the beam?
Steve Conner, Sun Oct 22 2006, 11:56AM
That's pretty impressive! What is the first picture, a piece of foam plastic burnt by the beam?

Re: Laser Mounting Fun
Marko, Sun Oct 22 2006, 12:12PM
I hesitated to reply because I was ashamed of my ignorance :/
IIRC, your ssy1 yag is a heavily-dobed for pulsed operation, how you plan to run it with CW diodes?
How do you solder the dies to tin? Are they metal-plated already..?
Marko, Sun Oct 22 2006, 12:12PM
I hesitated to reply because I was ashamed of my ignorance :/
IIRC, your ssy1 yag is a heavily-dobed for pulsed operation, how you plan to run it with CW diodes?
How do you solder the dies to tin? Are they metal-plated already..?
Re: Laser Mounting Fun
..., Sun Oct 22 2006, 07:31PM
The first pic is a piece of antistatic foam that was held ~.5" from the array. The holes are 1cm in diameter. I should point out that the beam coming out of the array is not normally round, but rather a 1cm line that is slowly diverging (at a few degrees- called the slow axis) in width, and very highly divergent on the vertical axis (like 90degrees- called the fast axis). It just so happened that at .5" away from the bar the fast axis had diverged 1cm, which was the length of the slow axis, which gave a nice beam. It would not work to put a lens in front of it to get a smaller spot, you would get a line ~1cm long.
Don't be ashamed Firkragg, I was asking that same question 2 weeks ago
Basically, the doping of the yag is not very crucial, just so long as you have enough it will work. For flashamp bars they use a very high doping (like 1-3%) because it has to handle very high pulses. For diode lasers we use lower doping (like .5%) because we are running considerably (well, in most cases) lower peak power. The added Nd ions are harmful, they are not too large of a problem.
The reason that I cannot use a ssy-1 head unmodified has to to with the % reflectance of the output coupler (OC) mirror. No one knows the exact reflectance, but we think is is ~80%. This means that you have to have a lot of power into the bar before you get enough feedback for it to start lasing, which is good for a flashlamp pumped laser. I am going to replace it with a much higher reflectance (~98%) one, which will give a much higher amount of feedback, which will hopefully lower the threshold to a reasonable value. (sam noted that it might even work at a few watts)
As to soldering these guys down, they are already gold plated on both sides. All you do is set the copper mount on a how plate set for ~110c, add some flux (I am using a normal flux pen, but it doesn't seen very soluble in IPA, so I may try something different), add a very small amount of solder (melting point = 97C), and use a q-tip to smear it around. Now set on a bar, shiny side DOWN (put it in upside down the first time >_<) and pray that you got the side the light comes out forward (got that backward the first time too) and if all went well it will suck down onto the solder and life will be good. Use a cut off q-tip (ie the wooden stick side) to position it exactly on the edge of the mount. Then let it cool, add a little more flux on the top of the die, heat is back up and add a tine bit more solder to the top, then smear with a q-tip, and wipe most of it off. Then grab a piece of copper foil, add some flux, set on the plate, tin the tip, wipe the solder off, then carefully set it on the bar (with an insulator below it) and then bolt it down. I had to use a piece of copper to put some pressure on the whole sandwich while it cooled to keep everything nice and tight (you want to have the absolute minimum amount of solder between the die/copper block since indium isn't the greatest conductor, and be positive that there are no bubbles under the bar or the temp will be uneven and the wavelength wont be constant across the whole bar).
Viola, GaAs sandwich
..., Sun Oct 22 2006, 07:31PM
The first pic is a piece of antistatic foam that was held ~.5" from the array. The holes are 1cm in diameter. I should point out that the beam coming out of the array is not normally round, but rather a 1cm line that is slowly diverging (at a few degrees- called the slow axis) in width, and very highly divergent on the vertical axis (like 90degrees- called the fast axis). It just so happened that at .5" away from the bar the fast axis had diverged 1cm, which was the length of the slow axis, which gave a nice beam. It would not work to put a lens in front of it to get a smaller spot, you would get a line ~1cm long.
Don't be ashamed Firkragg, I was asking that same question 2 weeks ago

Basically, the doping of the yag is not very crucial, just so long as you have enough it will work. For flashamp bars they use a very high doping (like 1-3%) because it has to handle very high pulses. For diode lasers we use lower doping (like .5%) because we are running considerably (well, in most cases) lower peak power. The added Nd ions are harmful, they are not too large of a problem.
The reason that I cannot use a ssy-1 head unmodified has to to with the % reflectance of the output coupler (OC) mirror. No one knows the exact reflectance, but we think is is ~80%. This means that you have to have a lot of power into the bar before you get enough feedback for it to start lasing, which is good for a flashlamp pumped laser. I am going to replace it with a much higher reflectance (~98%) one, which will give a much higher amount of feedback, which will hopefully lower the threshold to a reasonable value. (sam noted that it might even work at a few watts)
As to soldering these guys down, they are already gold plated on both sides. All you do is set the copper mount on a how plate set for ~110c, add some flux (I am using a normal flux pen, but it doesn't seen very soluble in IPA, so I may try something different), add a very small amount of solder (melting point = 97C), and use a q-tip to smear it around. Now set on a bar, shiny side DOWN (put it in upside down the first time >_<) and pray that you got the side the light comes out forward (got that backward the first time too) and if all went well it will suck down onto the solder and life will be good. Use a cut off q-tip (ie the wooden stick side) to position it exactly on the edge of the mount. Then let it cool, add a little more flux on the top of the die, heat is back up and add a tine bit more solder to the top, then smear with a q-tip, and wipe most of it off. Then grab a piece of copper foil, add some flux, set on the plate, tin the tip, wipe the solder off, then carefully set it on the bar (with an insulator below it) and then bolt it down. I had to use a piece of copper to put some pressure on the whole sandwich while it cooled to keep everything nice and tight (you want to have the absolute minimum amount of solder between the die/copper block since indium isn't the greatest conductor, and be positive that there are no bubbles under the bar or the temp will be uneven and the wavelength wont be constant across the whole bar).
Viola, GaAs sandwich

Re: Laser Mounting Fun
..., Tue Nov 07 2006, 01:51AM
I just wanted to note that I am still slaving away with these diodes (I not done anything not related to lasers or school besides attend a scout meeting and go trick-or-treating in weeks) and am making some progress. I have mounted 2 more bars, although that has not been my primary focus.
Some of you diehard 4hv fans may remember MdFluffin's thread about some green modules he acquired here. Since he was in the buy of the laser diodes, we decided that I would take a stab at fixing his modules.
So he shipped then over, I took then apart, and determined that all of his diodes were dead (not having an optical spectrometer I just held my combination vandate/ktp crystal in front of the laser running a 1A, and none gave any green).
So I needed 3 808nm laser diodes... Then I looked at the bars and thought a little more. Then I got out the exacto knife and after sacrificing most of a bar to the laser gods I managed to cleave out a few laser chips.
So I soldered one down to the c-mount on his laser, and then bolted the mess back together, and viola it worked! I ran it at 1.2A for ~5 hours and it seemed really dependent on temp (I have seen anywhere from 5mw to 75mw) but placing the whole module on a heatsink (so it stayed at room temp) I got a pretty stable 20mw of green. Just enough to see the beam in artificial light.
I also made up some labels for my diodes based on the info that I got from the ones I mounted, and listed one on eBay here
edit:
Some yag rods just showed up, as soon as someone posts I will post pics. Green laser repair pics available if requested.
Re: Laser Mounting Fun
McFluffin, Tue Nov 07 2006, 05:47AM
Well, being partner in crime...probably about time I say SOMETHING on this thread. Just been a bit busy. Anyway, too bad about the YAG rod, hope everything works out with that. Worst part is I live near the person who shipped it and I believe they said I could have inspected and probably picked it up myself. Then I could have shipped it off safely. I have a large (0 to 7.5V, 0 to 150A) power supply coming to me to test the diodes. Just hoping it is regulated enough. I ordered a largish TEC for the PGL lasers which I'm hoping will help with that. Might get something smaller later, but it would be good to have as a general purpose cooler to mess with. Hope all goes well with eBay.
Re: Laser Mounting Fun
..., Tue Nov 07 2006, 06:37AM
The yag rod John is reffering to is this:
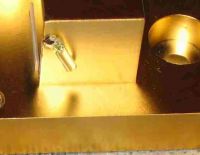
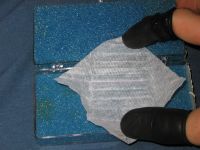
The seller (who will remain nameless until the problem is resolved) packages it as so:
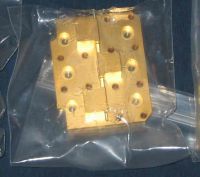
And in shipping it it snapped one of the ends off. That yag may be strong, but it isn't up to UPS without some protection...
In any case, I did get one rod in tact
And some mounts
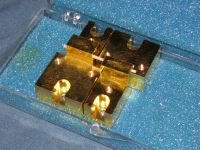
Unfortunately the mounts are for a 1.6mm rod, and I got a 1.2mm rod, so there is .4mm of play. While that doesn't sound like a lot, it should be like .01mm or something insanley perfect. But then again the mounts were free so I can't really complain
..., Tue Nov 07 2006, 06:37AM
The yag rod John is reffering to is this:

The seller (who will remain nameless until the problem is resolved) packages it as so:

And in shipping it it snapped one of the ends off. That yag may be strong, but it isn't up to UPS without some protection...
In any case, I did get one rod in tact

And some mounts

Unfortunately the mounts are for a 1.6mm rod, and I got a 1.2mm rod, so there is .4mm of play. While that doesn't sound like a lot, it should be like .01mm or something insanley perfect. But then again the mounts were free so I can't really complain

Print this page
