
3-Stage Coil Gun - (Quest for 200m/s)
aarpcard, Fri Apr 10 2015, 02:02AMHey guys,
I've been a member of this forum for a while, but rarely post. The few times I've posted asking questions, you all have been extremely helpful. I just want to share my current project on here.
I've been building coil guns for 6 years now - each new design has evolved out of it's predecessor. Currently I'm on my 4th design. I've made a lot of progress, but I'm a looong way from finished. Ultimately my goals are as follows:
-200m/s projectile velocity.
-Projectile flight stabilization
-Some kind of portability (will probably require a backpack with an umbilical cord to the gun itself.)
-Failsafe, fully automated controls, and easy to understand controls.
Currently I have the first two stages of the gun built and firing. The second stage is not yet tuned, nor is the timing correct on the trigger. With just the first stage, I've achieved 30m/s. This is about 2.5% efficiency. I'm hoping to get to about 50+m/s with the second stage fully completed. I haven't wound the third stage yet.
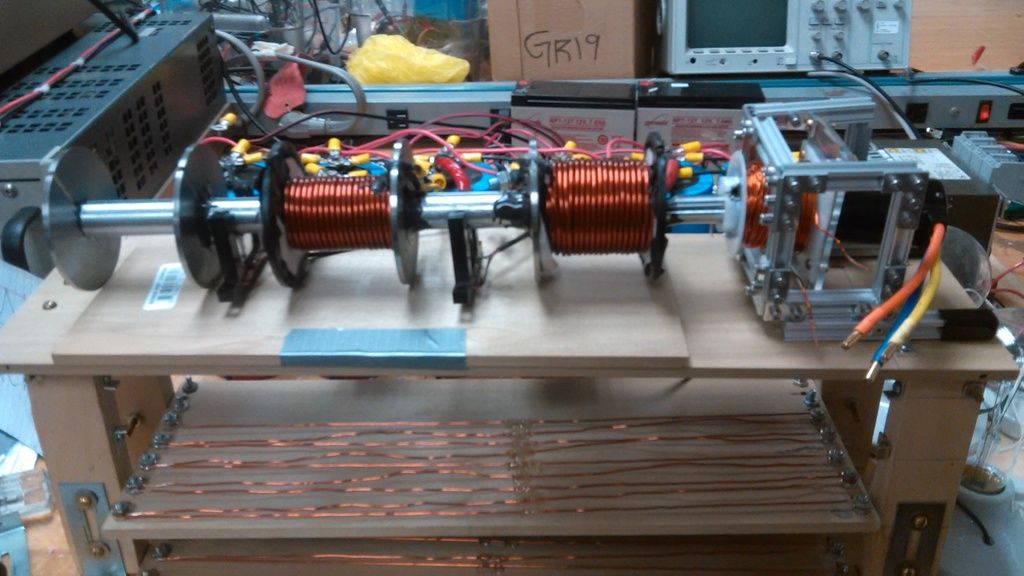
Here's the business end of the gun. The first two coils are wound with 10awg magnet wire. The firing tube itself is 1/16th inch thick aluminum. The coils are bound on each side by 1/8th inch thick steel washers. The third coil isn't wound yet. You can see the optocouplers in between the coils.
The assembly on the back of the firing tube is a AC induction motor and a solenoid that act to spin up the projectile to ~50,000rpm prior to firing. This should mimic rifling and hopefully stabilize the projectile in flight.
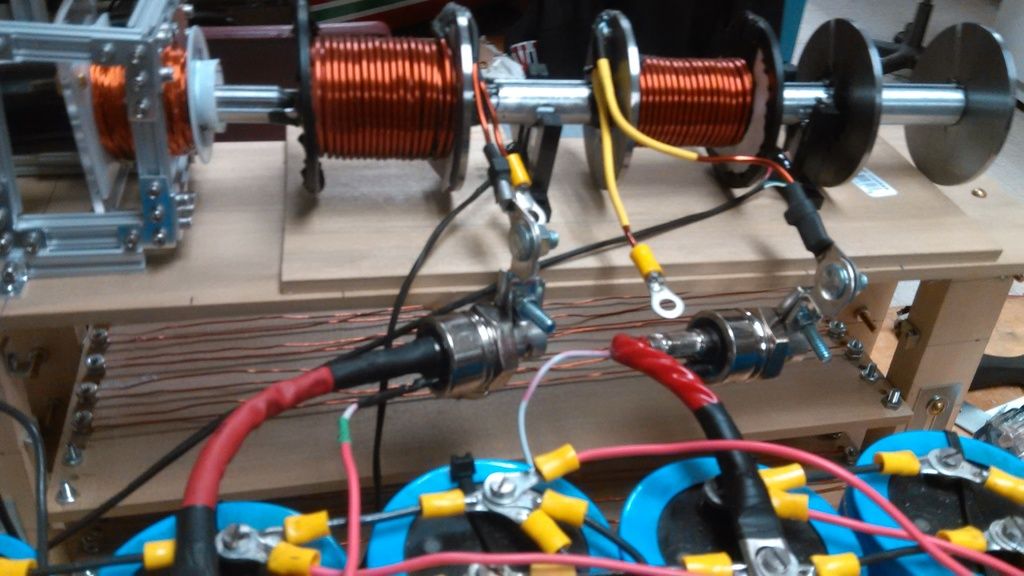
Below is the reverse side of the firing assembly. I'm using KP100A SCR's for the switching. They're crap Chinese SCR's but at least they're cheap and work well when they're not DOA.
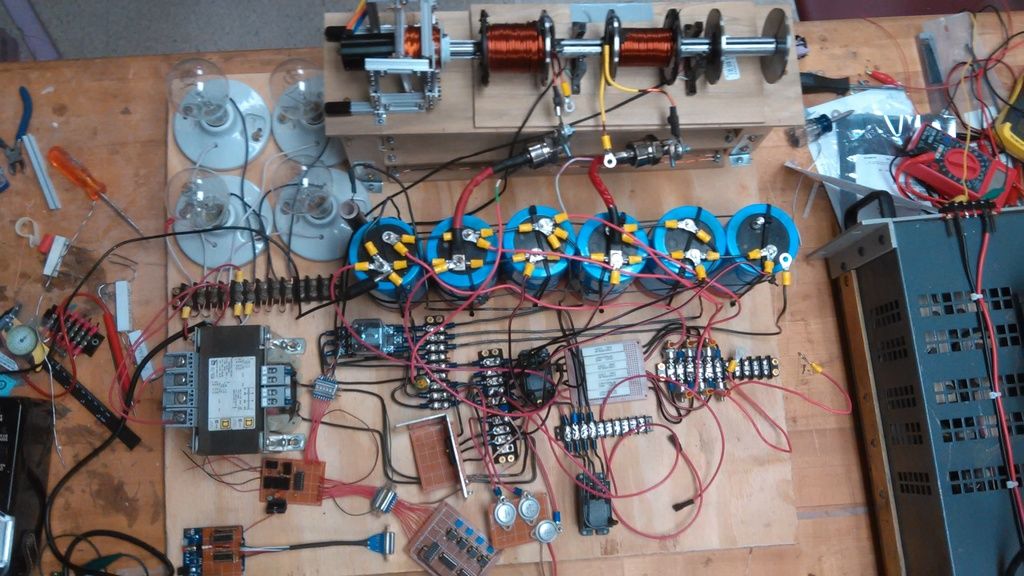
Here's a top down view of the whole system. The capacitors are rated at 520V and 1800uF a piece. Three are for the first coil, two for the second, and one for the third. In the bottom left you can see some of the logic circuitry. There the optical board, a temporary switch board, and an arduino with some glue logic for sensing the projectile velocity.
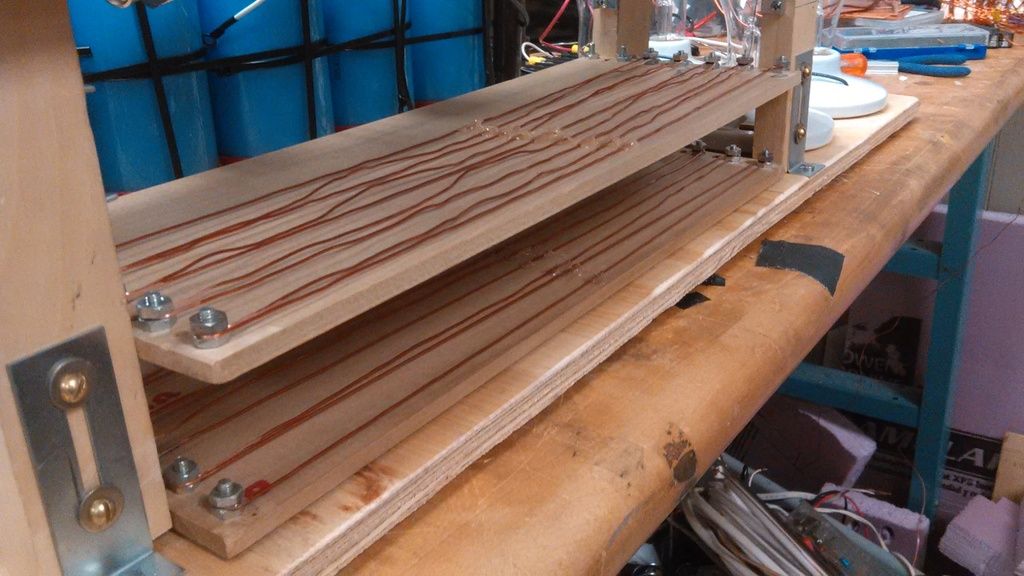
Below the assembly, are the dampening resistors. Each is 100mohms with taps every 10mohms. I haven't made the third resistor for the final coil yet. Each is built out of 16awg magnet wire.
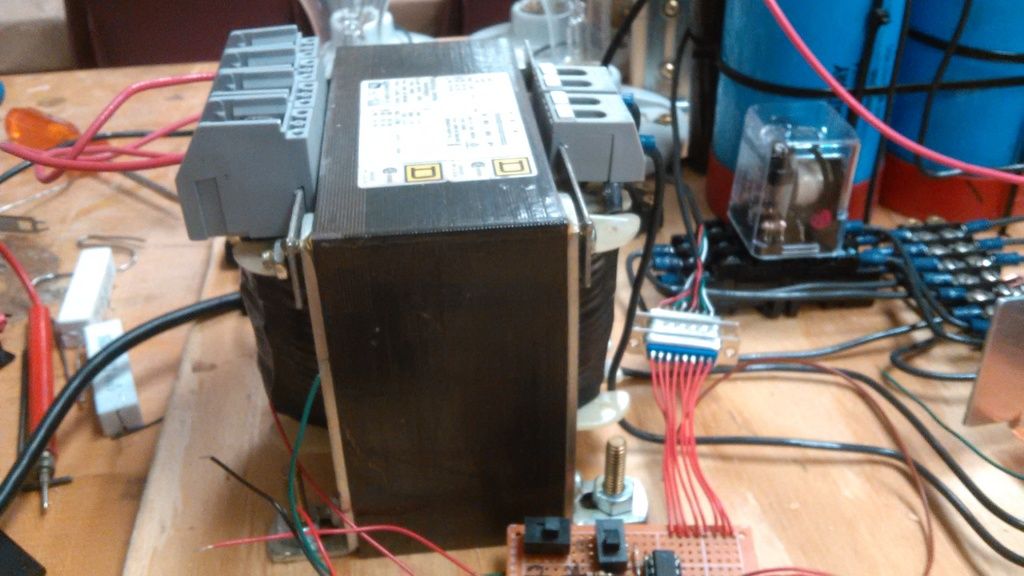
Here's the main transformer providing the charging voltage. It's a 4kw PLC transformer wired in reverse. 120V primary, 600V secondary. In it's current configuration it can charge the bank in about 6 seconds.
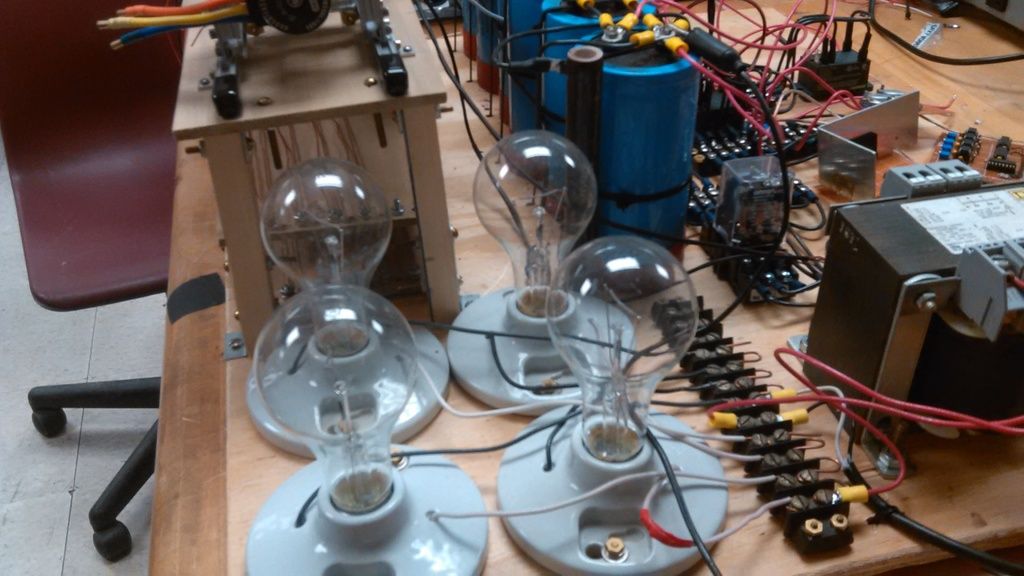
In need to current limit the primary side of the transformer so it doesn't blow the breaker. I have 4, 200watt light bulbs in parallel in line with the primary on the transformer. You can also see the 100W, 5kohm wirewound dump resistor I have used for discharging the cap banks when I don't want to fire the gun.
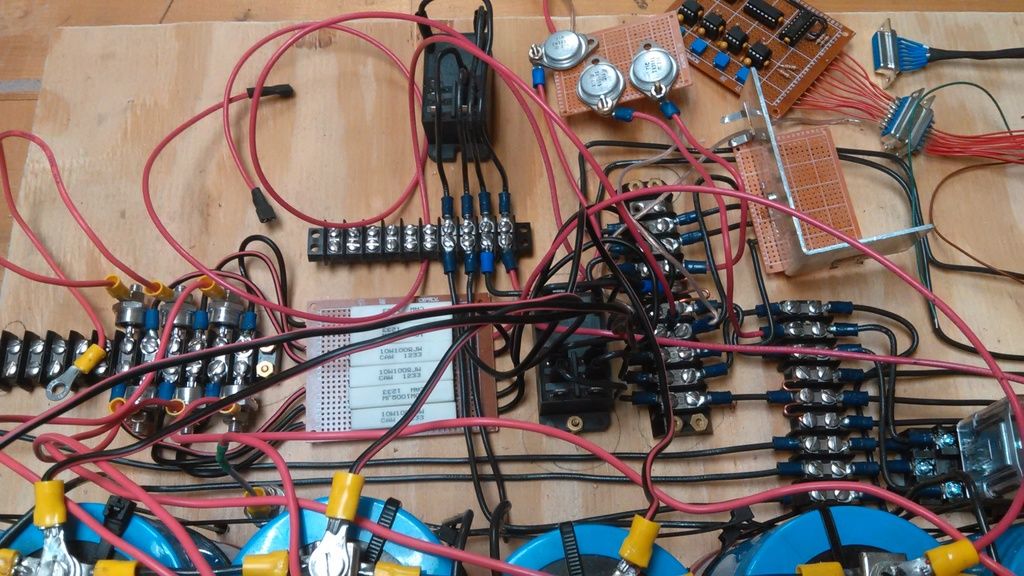
Here's all the HV circuitry. The caps are are charged together and then a relay switches, separating them into banks of 3, 2 and 1 caps. Everything is controlled by relays and will eventually be automated by logic.
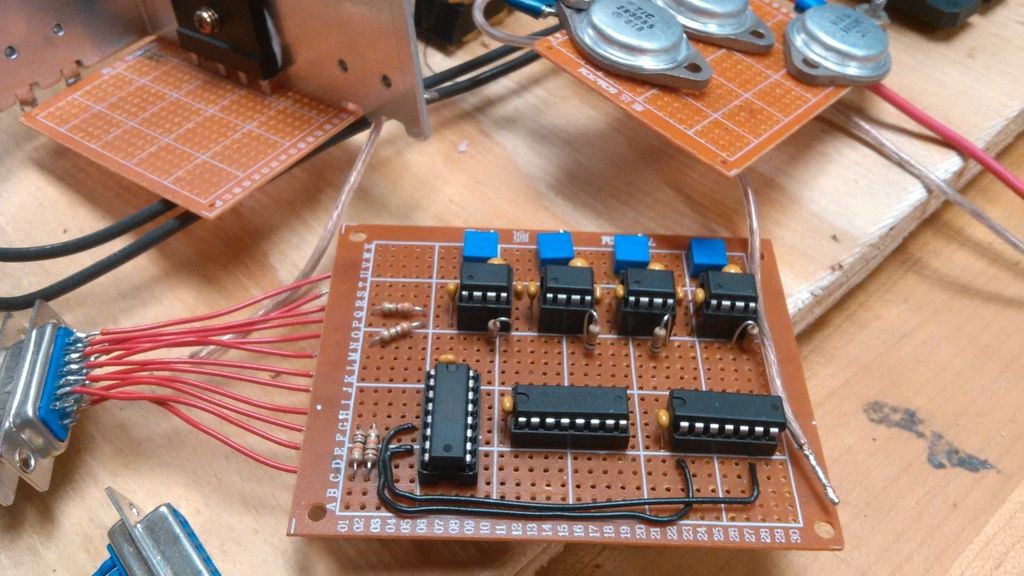
Below is the optical board. It takes the readings from the optocouplers and sends the firing signals to the second and third SCRs. I have delays built in for fine tuning the timing of each consecutive coils. Additionally, there is hardware hysteresis which requires that the optocoupler stay triggered for a tunable period of time before the board accepts it actually was triggered. This is to avoid accidental triggers from dust or other noise.
This is one of 4 logic boards that will be in the final gun.
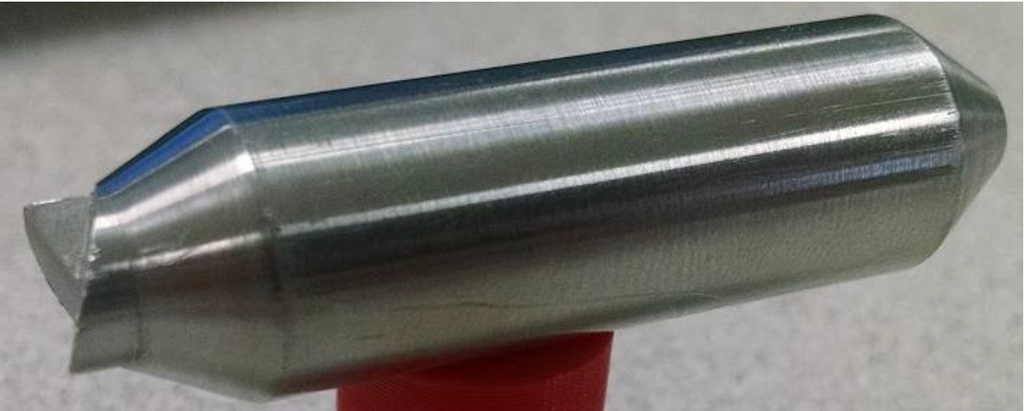
Here's a close up of the projectile. It's machined from solid steel. It is 40mm long and weighs 41grams. The notches at the rear interface with a coupling on the rifling motor.
Right now I'm working on tuning the second coil. I'm also in the process of building a voltage monitor board which will read the voltage on the capacitor bank, output it to a display, and also control the charging of the capacitors based on the current back voltage. When the gun goes into firing mode, this board will isolate the capacitors from all other circuitry. Ultimately everything will be automated. There will be 3 buttons: Power, a dump switch for the cap bank, and the trigger.
Once I have all of the subsystems functioning correctly, I'm going to work on stepping up the voltage to ~1000V from 520V. Hopefully this will result in a doubling of my projectile velocity. In order to do this though, I'm going to have to make custom charging relays.
I'm also planning on building a DC-DC converter to power the system off of a car battery so I don't need to be tethered to the wall.
Once everything is built and working, I'll start working on making the design portable. It will most likely consist of a backpack housing the capacitors and other circuitry with a tether going to the firing tube itself in gun form.
Re: 3-Stage Coil Gun - (Quest for 200m/s)
Signification, Fri Apr 10 2015, 04:39AM
WOW! ...can't wait to see you reach 200 m/s! I believe you will!
Just a couple of observations:
Have you used the rotating stabilizer scheme before? Does it work? ...in thinking about this, I started wondering if the rotational motion imparted to the projectile by the motor would tend to be 'braked' by the linear acceleration applied by the coils later?? Perhaps you need such high RPM's to compensate for this?
The large damping resistor scheme you use reminded of some "train-brake" resistors I use to charge super-caps. They are about 0.1 Ohms (100 milliOhms) and rated in the kW range. Each has about 20 turns of exposed steel sheeting wrapped on a ceramic core. These windings can easily be tapped with a heavy jumper giving 0 - 100mOhm in 20 5 milliOhm steps (actually much finer if you go around the steel spiral).
Re: 3-Stage Coil Gun - (Quest for 200m/s)
DerAlbi, Fri Apr 10 2015, 09:36AM
You are speaking of 820J kinetic energy here. As i see you use SCR-Design... so your efficiency is limited to... well.. lets just say 8-10% for multisage and a conductive barrel.... You really have a 10kJ Cap bank there? doesnt look like it. (actually you currently have only 1460J cap bank. so you would need 56% efficiency no way, sry)
Have you done some math here? just because the first stage spits out 50m/s, doesnt mean 4 coils spit out 200m/s. more like 100m/s. Also doubling voltage doesnt mean double velocity. The resulting higher current will result in deeper saturation, lowering the efficiency further. In the end: you put more in, but dont get proportional more out.
I aim for 100m/s too... but only with 24g projectile.... but my goal is pure efficiency and portability and confirming my simulation model.
And i really can tell you: your coils wont last long. The compressive force will soon short out the turns, because the isolation cant handle repeated stress. it will wear off pretty soon. you should fill your coils with resin.
I just use a brush to apply resin at every new layer. after winding i put current though the coil to heat it up (5-10W) and the resin is cured after 15min.
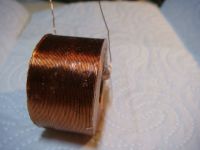
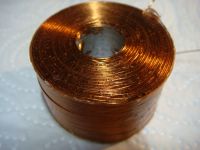
Are you sure with that v=200m/s at m=41g??? Sry.. opposed to Signification, i dont see how this could succeed. Maybe Signification got drawn away by all the pictures of the holy copper-work But lets just stick to numbers, ok?
Keep up the work PLEASE just lower you expectations a bit.. its allways better to be suprised by the results than beeing disapointed.... trust me.
DerAlbi, Fri Apr 10 2015, 09:36AM
You are speaking of 820J kinetic energy here. As i see you use SCR-Design... so your efficiency is limited to... well.. lets just say 8-10% for multisage and a conductive barrel.... You really have a 10kJ Cap bank there? doesnt look like it. (actually you currently have only 1460J cap bank. so you would need 56% efficiency
 no way, sry)
Have you done some math here? just because the first stage spits out 50m/s, doesnt mean 4 coils spit out 200m/s. more like 100m/s. Also doubling voltage doesnt mean double velocity. The resulting higher current will result in deeper saturation, lowering the efficiency further. In the end: you put more in, but dont get proportional more out.
I aim for 100m/s too... but only with 24g projectile.... but my goal is pure efficiency and portability and confirming my simulation model.
And i really can tell you: your coils wont last long. The compressive force will soon short out the turns, because the isolation cant handle repeated stress. it will wear off pretty soon. you should fill your coils with resin.
I just use a brush to apply resin at every new layer. after winding i put current though the coil to heat it up (5-10W) and the resin is cured after 15min.


Are you sure with that v=200m/s at m=41g??? Sry.. opposed to Signification, i dont see how this could succeed. Maybe Signification got drawn away by all the pictures of the holy copper-work
 But lets just stick to numbers, ok?
Keep up the work
 PLEASE just lower you expectations a bit.. its allways better to be suprised by the results than beeing disapointed.... trust me.
Re: 3-Stage Coil Gun - (Quest for 200m/s)
aarpcard, Fri Apr 10 2015, 07:11PM
The current cap bank has 10800uF total capacitance at 520V, so yes ~1460J.
The projectile has a mass of 41 grams.
I'm aiming for 70-90m/s with this current setup @520V. This translates into an efficiency of 6.8-11%. I'm still planning on using external iron to try and raise the efficiency even more.
Once I double the voltage, I will be using the same capacitance, but at 1000V. I'm going to use 12 capacitors in series parallel pairs. This will result in 5400J stored in the cap bank. I'm not too knowledgeable on magnetic saturation when it comes to coil guns, but from what I've been able to figure out, due to the size of my projectile, and my anticipated current peak at 1000V, I don't think saturation will pose too much of a problem - however I might be completely wrong. I'm looking forward to figuring this out.
For 200m/s this would require ~15% efficiency - not 56% like you stated. I understand 15% is a bit unrealistic, but it's a nice number to aim for.
I've been thinking about potting the coils with either resin or something else once I get them dialed in. I was considering using JB weld . . .
Re: 3-Stage Coil Gun - (Quest for 200m/s)
DerAlbi, Fri Apr 10 2015, 07:52PM
if you stack up the capacitor, of course the needed efficiency figure changes. but it contradicts other goals... like
but ok, go on lets hope it works out. a fat projectile is a good point to start.. soo good luck
I think.. that you get 15%eff after voltage doubling you would need 20..25%Eff before doubling the voltage. thats quite a goal for a scr desgin. these figures are hard to get even with a hobbyist-halfbridge.
DerAlbi, Fri Apr 10 2015, 07:52PM
if you stack up the capacitor, of course the needed efficiency figure changes. but it contradicts other goals... like
Some kind of portability..with a car then

but ok, go on
 lets hope it works out. a fat projectile is a good point to start.. soo good luck
I think.. that you get 15%eff after voltage doubling you would need 20..25%Eff before doubling the voltage. thats quite a goal for a scr desgin. these figures are hard to get even with a hobbyist-halfbridge.
Re: 3-Stage Coil Gun - (Quest for 200m/s)
Signification, Sat Apr 11 2015, 09:11AM
@aarpcard Did you know that JB-weld is quite magnetic when dry?
@Deralbi
Nicely wound coil--what are the specs on it? wire gauge, dia, length, total turns--that center hole looks at least 1/2" dia.
[Moderator edit: double posts merged by moderator Mads Barnkob]
Re: 3-Stage Coil Gun - (Quest for 200m/s)
DerAlbi, Sat Apr 11 2015, 11:45AM
Wire is 0.4mm as stated above. Everything else.. count the layers and turns/layers Its a multiple of 0.4mm for sure. Check out the project section.. i post some results now.
DerAlbi, Sat Apr 11 2015, 11:45AM
Wire is 0.4mm as stated above. Everything else.. count the layers and turns/layers
 Its a multiple of 0.4mm for sure. Check out the project section.. i post some results now.
Re: 3-Stage Coil Gun - (Quest for 200m/s)
aarpcard, Sat Apr 11 2015, 03:38PM
No I didn't - I wonder if that would be beneficial or not. Might it eliminate the need for external iron?
aarpcard, Sat Apr 11 2015, 03:38PM
Signification wrote ...
@aarpcard Did you know that JB-weld is quite magnetic when dry?
@aarpcard Did you know that JB-weld is quite magnetic when dry?
No I didn't - I wonder if that would be beneficial or not. Might it eliminate the need for external iron?
Re: 3-Stage Coil Gun - (Quest for 200m/s)
DerAlbi, Sat Apr 11 2015, 05:50PM
hmmh. until you tried it, i wouldnt say definitvely that you actually have the need for external iron. it can help but its not guarantied...
And thats actually an interesting topic: highly permeable mertial inside the coil.. hmmh. What if you actually use iron as wire material?
Re: 3-Stage Coil Gun - (Quest for 200m/s)
hen918, Sat Apr 11 2015, 06:05PM
Very high resistance...
hen918, Sat Apr 11 2015, 06:05PM
DerAlbi wrote ...
...
And thats actually an interesting topic: highly permeable mertial inside the coil.. hmmh. What if you actually use iron as wire material?
...
And thats actually an interesting topic: highly permeable mertial inside the coil.. hmmh. What if you actually use iron as wire material?
Very high resistance...
Re: 3-Stage Coil Gun - (Quest for 200m/s)
DerAlbi, Sat Apr 11 2015, 06:15PM
does not matter at all. L/R is important.... the question is: increases the iron wire the inductance compared to copper wire? and how would the coupling be... i kind of suspect that te coupling is not so good, since the magnetic field is allready happy inside the coil.. hmmmh. simulation incomming^^ but i have not the time right now.
Re: 3-Stage Coil Gun - (Quest for 200m/s)
BigBad, Sat Apr 11 2015, 08:13PM
You don't want iron within your turns, it would short out the magnetic field; you want the core material all inside all the turns; none of it in the actual windings, otherwise you'll get no field external to the windings at all, the lines of flux will close within the turns themselves; it's a magnetic short circuit.
Re: 3-Stage Coil Gun - (Quest for 200m/s)
Signification, Sat Apr 11 2015, 11:33PM
@aarpcard,
I put a strong Neo magnet to the tube of JB-weld: it REALLY pulls! (NOT the hardener)..I haven't thought of it WRT coilguns yet, but definitely will right away. I am also extremely anxious to know your (and other's) thoughts too!
Signification, Sat Apr 11 2015, 11:33PM
@aarpcard,
I put a strong Neo magnet to the tube of JB-weld: it REALLY pulls! (NOT the hardener)..I haven't thought of it WRT coilguns yet, but definitely will right away. I am also extremely anxious to know your (and other's) thoughts too!
Re: 3-Stage Coil Gun - (Quest for 200m/s)
aarpcard, Mon Apr 13 2015, 04:07AM
I don't want to risk messing up the coils in this build by potting them in JB Weld. I do however have a smaller coil I built for a past gun I'm not using that'd I'd be willing to test on.
I'll get some baseline readings and see how JB weld affects it. I suspect BigBad is correct though.
Re: 3-Stage Coil Gun - (Quest for 200m/s)
Signification, Mon Apr 13 2015, 09:18AM
My suggestion, (after think about reluctance): "DON'T PUT JB-WELD IN THE COILS". Find a good use in the projectile!
Signification, Mon Apr 13 2015, 09:18AM
My suggestion, (after think about reluctance): "DON'T PUT JB-WELD IN THE COILS". Find a good use in the projectile!
Re: 3-Stage Coil Gun - (Quest for 200m/s)
klugesmith, Tue Apr 14 2015, 12:20AM
The bit about damping resistors and train-braking resistors reminded me of a cast-iron artifact in my collection.
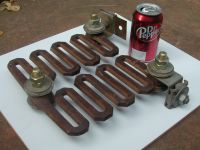
For home-made damping resistors, don't forget the large temperature coefficient of copper (not far behind that of tungsten). When temperature has risen 100 degrees C, the resistance has increased by 40% or 50%.
If temperature doesn't get that high during sustained firing, you are wasting space and material.
Metals like nichrome (or stainless steel, or plain steel) have high resistivity to begin with, and smaller temperature coefficients.
An Internet search found serpentine iron resistors in a picture halfway down this blog page, under June 18, 2010:
klugesmith, Tue Apr 14 2015, 12:20AM
The bit about damping resistors and train-braking resistors reminded me of a cast-iron artifact in my collection.

For home-made damping resistors, don't forget the large temperature coefficient of copper (not far behind that of tungsten). When temperature has risen 100 degrees C, the resistance has increased by 40% or 50%.
If temperature doesn't get that high during sustained firing, you are wasting space and material.
Metals like nichrome (or stainless steel, or plain steel) have high resistivity to begin with, and smaller temperature coefficients.
An Internet search found serpentine iron resistors in a picture halfway down this blog page, under June 18, 2010:

Print this page