
My Flash Forge Creator 3D Printer.
Patrick, Fri Aug 15 2014, 05:04AMOh yeah, un-boxing ceremony !
FlashForge Creator , single extruder, wood case.
ABS, PLA, HIPS, PET capable. 6x6x9 in build volume.
700 US$, Heated build plate.
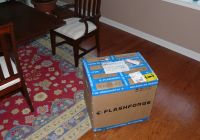
A
B
C
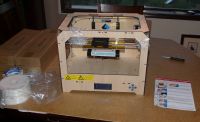
1kg ABS spool and the machine. This spool is 64 inches cubed, which means 0.50 $ per cubic inch of ABS or PLA.
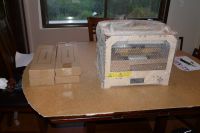
F
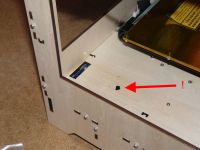
A suspicious piece of loose plastic ! ( This does not bode well )
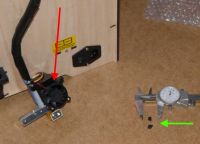
A second piece fell out from the extruder upon unwrapping.
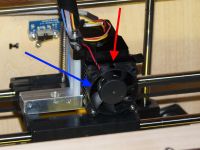
Surprise ! the two pieces fit perfectly the broken fan. Sigh...
FlashForge has a reputation of making things right supposedly, so we'll see. I expect theyll make this right, by sending me a new fan.
continuing on...
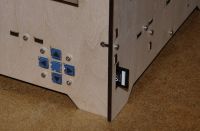
SD card printing or USB conection. Thus a sleep mode on the computer wont kill the in process print (using the SD card).
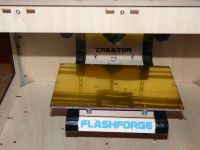
Builld table, covered in kapton tape. Heated up to 120C. 6x9 inches.
.
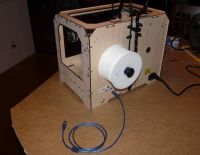
Spool!
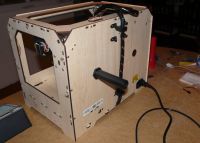
Spool Holder!
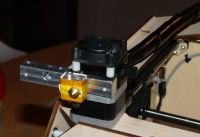
Extruder nozzle wrapped in yellow insulation, 0.4mm diameter. seen here with stepper motor, fan and filiment feed.
Re: My Flash Forge Creator 3D Printer.
Carbon_Rod, Fri Aug 15 2014, 08:00AM
These things require a bit of maintenance with use.
It looks like you have a metal extruder head...
These type of print heads can be far less forgiving than the low temp PET lined ones.
Tip: Foam soaked in mineral oil wiping the filament can fix jams.
I “upgraded†the worn-out rep-rap Prusa j-head for an aluminum Geeetech one.
Without the oil wiper, it jams with ABS like 3 times an hour...
Tip2: Homing the print head after each adjustment,
Get a 0.4mm feeler gauge to level the bed in each corner while hot or even your raft may not "stick".
Tip3: openscad is easy to learn...

the GUI can be lame... but the objects make perfect STL files...
These things are very useful once you figure out how to get it to work correctly.
Carbon_Rod, Fri Aug 15 2014, 08:00AM
These things require a bit of maintenance with use.
It looks like you have a metal extruder head...
These type of print heads can be far less forgiving than the low temp PET lined ones.
Tip: Foam soaked in mineral oil wiping the filament can fix jams.
I “upgraded†the worn-out rep-rap Prusa j-head for an aluminum Geeetech one.
Without the oil wiper, it jams with ABS like 3 times an hour...

Tip2: Homing the print head after each adjustment,
Get a 0.4mm feeler gauge to level the bed in each corner while hot or even your raft may not "stick".
Tip3: openscad is easy to learn...

the GUI can be lame... but the objects make perfect STL files...
These things are very useful once you figure out how to get it to work correctly.
Re: My Flash Forge Creator 3D Printer.
Ash Small, Fri Aug 15 2014, 09:32AM
So, diagonally, you could just about make a mold for a 10" heli blade?
Ash Small, Fri Aug 15 2014, 09:32AM
So, diagonally, you could just about make a mold for a 10" heli blade?
Re: My Flash Forge Creator 3D Printer.
Patrick, Fri Aug 15 2014, 02:14PM
Carbon Rod, can we see your work... ive heard the creator extruder series greatly improved reliability and repeatability.
Patrick, Fri Aug 15 2014, 02:14PM
Ash Small wrote ...
So, diagonally, you could just about make a mold for a 10" heli blade?
i was thinking of making multi-section molds that pop and epoxy together, so we could even do 20" diameters, or more.So, diagonally, you could just about make a mold for a 10" heli blade?
Carbon Rod, can we see your work... ive heard the creator extruder series greatly improved reliability and repeatability.
Re: My Flash Forge Creator 3D Printer.
Hazmatt_(The Underdog), Fri Aug 15 2014, 08:54PM
Your "yellow insulation" is just Kapton tape. If you need to ever replace it, now you know what it is.
Hazmatt_(The Underdog), Fri Aug 15 2014, 08:54PM
Your "yellow insulation" is just Kapton tape. If you need to ever replace it, now you know what it is.
Re: My Flash Forge Creator 3D Printer.
Patrick, Sat Aug 16 2014, 04:37PM
Patrick, Sat Aug 16 2014, 04:37PM
Hazmatt_(The Underdog) wrote ...
Your "yellow insulation" is just Kapton tape. If you need to ever replace it, now you know what it is.
you mean on the table? Your "yellow insulation" is just Kapton tape. If you need to ever replace it, now you know what it is.
Re: My Flash Forge Creator 3D Printer.
Ash Small, Sat Aug 16 2014, 07:04PM
I think Matt means on the extruder nozzle. That's where you used the term "yellow insulation".
Ash Small, Sat Aug 16 2014, 07:04PM
Patrick wrote ...
Hazmatt_(The Underdog) wrote ...
Your "yellow insulation" is just Kapton tape. If you need to ever replace it, now you know what it is.
you mean on the table? Your "yellow insulation" is just Kapton tape. If you need to ever replace it, now you know what it is.
I think Matt means on the extruder nozzle. That's where you used the term "yellow insulation".
Re: My Flash Forge Creator 3D Printer.
Patrick, Sat Aug 16 2014, 07:49PM
sigh, i cant get the USB driver to appear.
ok, ive got the machine working, so ill try a print in the next few hours.
Patrick, Sat Aug 16 2014, 07:49PM
Patrick wrote ...
yes theres Kapton, but it looks like half millmeter of fiber insulation too. Im trying to install python, on mt windows 7 machine but she just refuses... Hazmatt_(The Underdog) wrote ...
Your "yellow insulation" is just Kapton tape. If you need to ever replace it, now you know what it is.
you mean on the table? Your "yellow insulation" is just Kapton tape. If you need to ever replace it, now you know what it is.
sigh, i cant get the USB driver to appear.
ok, ive got the machine working, so ill try a print in the next few hours.
Re: My Flash Forge Creator 3D Printer.
Ash Small, Sat Aug 16 2014, 11:28PM
Glass fibre???
Ash Small, Sat Aug 16 2014, 11:28PM
Patrick wrote ...
sigh, i cant get the USB driver to appear.
Patrick wrote ...
yes theres Kapton, but it looks like half millmeter of fiber insulation too. Im trying to install python, on mt windows 7 machine but she just refuses... Hazmatt_(The Underdog) wrote ...
Your "yellow insulation" is just Kapton tape. If you need to ever replace it, now you know what it is.
you mean on the table? Your "yellow insulation" is just Kapton tape. If you need to ever replace it, now you know what it is.
sigh, i cant get the USB driver to appear.
Glass fibre???
Re: My Flash Forge Creator 3D Printer.
IamSmooth, Sun Aug 17 2014, 11:26PM
I just want to say I've been playing around with my MakerGear M2 and have done about 20 prints. Everyone of them with ABS has come out perfect. I am using hairspray to keep the piece matted to the heated bed.
IamSmooth, Sun Aug 17 2014, 11:26PM
I just want to say I've been playing around with my MakerGear M2 and have done about 20 prints. Everyone of them with ABS has come out perfect. I am using hairspray to keep the piece matted to the heated bed.
Re: My Flash Forge Creator 3D Printer.
Patrick, Mon Aug 18 2014, 12:23AM
Problem, Problem, Problem !
Ive been electrocuted by my machine. I was making the "small 20mm calibration box", and got it to pop off the table, then it slid to the floor of the work space. the floor of the work space is a normal user accessible surface. one or more screws gave me a jolt, made me weak in the knees, at which point i went to the cement floor, in some pain.
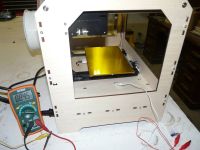
Having measured it with a witness, (lest i stop breathing) it appears to be 85 VAC on at least 3 screws.
a consumer product shouldn't be allowed to do this as per UL and other regulations. I dont know if only mine is defective, or if this is a production problem. The screws run to and hold in the SMPS, but im not sure what they attach to, and want to leave it the way it is, so flashforge can investigate their prodcut.
ill report this to flash forge tonight and see what they say.
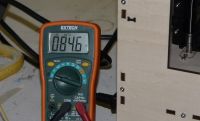
Voltmeter between ground prong from a socket and the screw.
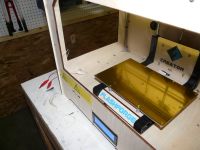
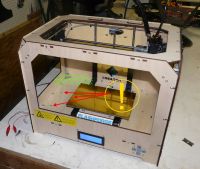
This inner volume is meant to have hands and tools in it, so it needs to meet all the safety standards of a consumer product.
Parts made:
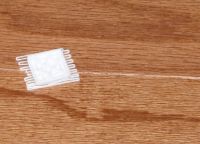
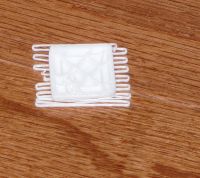
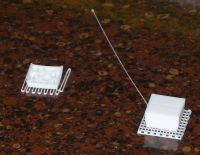
Patrick, Mon Aug 18 2014, 12:23AM
Problem, Problem, Problem !
Ive been electrocuted by my machine. I was making the "small 20mm calibration box", and got it to pop off the table, then it slid to the floor of the work space. the floor of the work space is a normal user accessible surface. one or more screws gave me a jolt, made me weak in the knees, at which point i went to the cement floor, in some pain.
Having measured it with a witness, (lest i stop breathing) it appears to be 85 VAC on at least 3 screws.
a consumer product shouldn't be allowed to do this as per UL and other regulations. I dont know if only mine is defective, or if this is a production problem. The screws run to and hold in the SMPS, but im not sure what they attach to, and want to leave it the way it is, so flashforge can investigate their prodcut.
ill report this to flash forge tonight and see what they say.

Voltmeter between ground prong from a socket and the screw.


This inner volume is meant to have hands and tools in it, so it needs to meet all the safety standards of a consumer product.

Parts made:


Re: My Flash Forge Creator 3D Printer.
IamSmooth, Mon Aug 18 2014, 12:27AM
Now that is definitely not right. I built mine from a kit so I know where all the wires are going. Your going to have to find out which wire is shorting. I guess you were making a partial ground with your body to the floor through your pants. A full grounding would have been worse not to mention this is a fire hazard.
Re: My Flash Forge Creator 3D Printer.
Patrick, Mon Aug 18 2014, 12:45AM
fire hazard, legal hazard, safety hazard...
my flip-flops werent good enough, which surprised me, literally! grounded from screw through upper organs to feet. Im not as young as i used to be, 85 VAC took me right out.
I still cant make files in Autocad and get them into replicator G.
Im using this link at the moment, but the work flow is crippling me.
Im starting to think its autocad thats the problem.
EDIT: ive found the problem, first i was expecting a 1 inch cylinder, when really it showed up as a 1mm cylinder. it was 6 yellow pixels, hence i couldnt see it, till reviewing the .stl file in a text editor.
next, its possible, (perhaps probable) flashforge doesnt realize its the SMPS maker who screwed up...
Patrick, Mon Aug 18 2014, 12:45AM
fire hazard, legal hazard, safety hazard...
my flip-flops werent good enough, which surprised me, literally! grounded from screw through upper organs to feet. Im not as young as i used to be, 85 VAC took me right out.
I still cant make files in Autocad and get them into replicator G.
Im using this link at the moment, but the work flow is crippling me.

Im starting to think its autocad thats the problem.
EDIT: ive found the problem, first i was expecting a 1 inch cylinder, when really it showed up as a 1mm cylinder. it was 6 yellow pixels, hence i couldnt see it, till reviewing the .stl file in a text editor.
next, its possible, (perhaps probable) flashforge doesnt realize its the SMPS maker who screwed up...
Re: My Flash Forge Creator 3D Printer.
Carbon_Rod, Mon Aug 18 2014, 07:56AM
First off, almost everyone gets different temperature settings that match their units extrusion rates and sensors. The above normal Head temperature on my unit may be device specific, and may require scaling the object up 4% (in slic3r) to compensate for cooling.
I would recommend slowly increasing the movement velocity until problems occur (positioning error), and back it off by 20% . It is counter intuitive, but sometimes faster means better quality prints as there is less collateral heat-damage to the surfaces/edges.
The work flow we use:
CAD -> STL -> Slic3r -> gcode -> Printrun
The work flow if you want the g-code file done more quickly:
CAD -> STL -> Meshlab -> simplified STL surfaces -> Slic3r -> gcode -> Printrun
I've attached the Slic3r import config for small ABS objects using 0.4mm extruder and 0.25mm layer height. Note the machine specific g-code that auto-resets the printer at the start of a run.
Re: My Flash Forge Creator 3D Printer.
Carbon_Rod, Mon Aug 18 2014, 07:58AM
Mime type error for upload attempt 1,
convert txt to ini file for import.

Cheers,
Rod
]config.ini.txt[/file]
Carbon_Rod, Mon Aug 18 2014, 07:58AM
Mime type error for upload attempt 1,
convert txt to ini file for import.

Cheers,
Rod
]config.ini.txt[/file]
Re: My Flash Forge Creator 3D Printer.
Patrick, Mon Aug 18 2014, 08:01AM
Carbon Rod, so far, i think ive got it all in hand, i was once a CNC laser operator, so i know all about the need for upping this, tweeking that, lessing the other. these just need to be learned.
but its the electric shock thing that has me concerned...
edit: thanks for the file, ill look at slic3er, and the other settings.
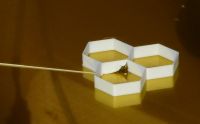
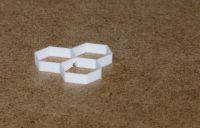
what i also want to know is how to make thin vertical walls. i have a 0.4mm nozzle (0.15 in) but want 0.040 in thick walls, (1mm), but dont know if fill is 100% with 3 shells?
EDIT: it looks like with my 0.4mm nozzle, i can get a single shell of 0.5mm, at a vertical res of 0.2mm. im also thinking about making I beam like structures, but dont know when or how to use "raft" yet...


Re: My Flash Forge Creator 3D Printer.
IamSmooth, Mon Aug 18 2014, 07:09PM
I use rafts when I'm using ABS and the object is more than 1cm above the heated bed. This helps hold the corners down so they don't warp as the top cools and contracts. This will pull the bottom off. I have my raft set to a 3mm perimeter.
IamSmooth, Mon Aug 18 2014, 07:09PM
I use rafts when I'm using ABS and the object is more than 1cm above the heated bed. This helps hold the corners down so they don't warp as the top cools and contracts. This will pull the bottom off. I have my raft set to a 3mm perimeter.
Re: My Flash Forge Creator 3D Printer.
ConKbot of Doom, Tue Aug 19 2014, 01:26AM
The electric shock shouldnt happen, the whole thing runs off of 24 VDC from one beefy power supply. Double check the grounding to make sure its not just a bite from emi cap leakage.
Either that or I'm mis-remembering and it runs off of 48V and you have a stepper motor with shorted insulation at one point and youre getting the push-pull drive from that.
If you start running into problems with it stopping mid print at seemingly random points, its probably EMI issues. Get a clamp on or slip on ferrite and put it on the ribbon cable. I can dig up a mouser part number if needed. I also went hog wild and re-wired it with continuous flex shielded cable for the steppers, but I dont think that was 100% needed.
Re: My Flash Forge Creator 3D Printer.
Patrick, Tue Aug 19 2014, 04:10AM
Patrick, Tue Aug 19 2014, 04:10AM
ConKbot of Doom wrote ...
The electric shock shouldnt happen, the whole thing runs off of 24 VDC from one beefy power supply. Double check the grounding to make sure its not just a bite from emi cap leakage.
Either that or I'm mis-remembering and it runs off of 48V and you have a stepper motor with shorted insulation at one point and youre getting the push-pull drive from that.
If you start running into problems with it stopping mid print at seemingly random points, its probably EMI issues. Get a clamp on or slip on ferrite and put it on the ribbon cable. I can dig up a mouser part number if needed. I also went hog wild and re-wired it with continuous flex shielded cable for the steppers, but I dont think that was 100% needed.
but the screws run directly into the SMPS, and it really looks like its AC from the socket. It sure felt like more than just a stepper kickback. The electric shock shouldnt happen, the whole thing runs off of 24 VDC from one beefy power supply. Double check the grounding to make sure its not just a bite from emi cap leakage.
Either that or I'm mis-remembering and it runs off of 48V and you have a stepper motor with shorted insulation at one point and youre getting the push-pull drive from that.
If you start running into problems with it stopping mid print at seemingly random points, its probably EMI issues. Get a clamp on or slip on ferrite and put it on the ribbon cable. I can dig up a mouser part number if needed. I also went hog wild and re-wired it with continuous flex shielded cable for the steppers, but I dont think that was 100% needed.
Re: My Flash Forge Creator 3D Printer.
Steve Conner, Tue Aug 19 2014, 08:11AM
If it were me I would open this up and take a look. Assuming there aren't any warranty seals that would prove that you opened it.
You should be able to unscrew the SMPS and look in the screw holes to see if the screws have mashed into anything they shouldn't.
It will be an off-the-shelf SMPS from Mean Well or someone similar, so you can pull up the datasheet for it and there should be a maximum screw penetration quoted. It may even be embossed right into the casing. If the screws penetrate further than that then the makers are idiots and need to be sued quick.

Re: My Flash Forge Creator 3D Printer.
Patrick, Wed Aug 20 2014, 05:41AM
my work flow seems to be:
1) AutoCAD (dxf or dwg) via export STL function saved as a file.
2) Import via Replicator G, generate G-code, save and export to G-code (to save future render/compile time)
3) take SD card or use USB to machine and start print.
* the previous trouble was that the Acad STL export was microscopic. As Acad dimensions were inches, and rep g expects millimeters. there is a button to convert in rep g, since STL standards dont have a unit specification.*
Im trying to figure out a site and some basic rules for print quality. Ill start a log book as soon as i get some experience with plastic extrusion. ive done all this with vertical mills, laser CNC and CNC punch presses in the past.
 maybe.
Patrick, Wed Aug 20 2014, 05:41AM
Steve Conner wrote ...
If the screws penetrate further than that then the makers are idiots and need to be sued quick.
I would think so, and have asked them, so we'll see. This device is a fully assembled consumer product, even available from Amazon.If the screws penetrate further than that then the makers are idiots and need to be sued quick.

my work flow seems to be:
1) AutoCAD (dxf or dwg) via export STL function saved as a file.
2) Import via Replicator G, generate G-code, save and export to G-code (to save future render/compile time)
3) take SD card or use USB to machine and start print.
* the previous trouble was that the Acad STL export was microscopic. As Acad dimensions were inches, and rep g expects millimeters. there is a button to convert in rep g, since STL standards dont have a unit specification.*
Im trying to figure out a site and some basic rules for print quality. Ill start a log book as soon as i get some experience with plastic extrusion. ive done all this with vertical mills, laser CNC and CNC punch presses in the past.
 maybe.
Re: My Flash Forge Creator 3D Printer.
IamSmooth, Thu Aug 21 2014, 01:57AM
I use simplify3d to take the STD file and convert to G code. If you use the same programs I have I could help you out. I am not familiar with the other programs.
IamSmooth, Thu Aug 21 2014, 01:57AM
I use simplify3d to take the STD file and convert to G code. If you use the same programs I have I could help you out. I am not familiar with the other programs.
Re: My Flash Forge Creator 3D Printer.
Patrick, Fri Aug 22 2014, 07:36PM
this link has helped a lot.
and:
IamSmooth, what does the simplfiy3d program settings panel look like for cross hatch, shells and such?
Patrick, Fri Aug 22 2014, 07:36PM
this link has helped a lot.

and:

IamSmooth, what does the simplfiy3d program settings panel look like for cross hatch, shells and such?
Re: My Flash Forge Creator 3D Printer.
IamSmooth, Sat Aug 23 2014, 12:33AM
SImplify3d is the interface that converts the STL to the G code file. You can preview the path of the printer if you wish line by line. It allows me to control the printer: temperature, cooling, heated bed. I can jog the settings, too.
IamSmooth, Sat Aug 23 2014, 12:33AM
SImplify3d is the interface that converts the STL to the G code file. You can preview the path of the printer if you wish line by line. It allows me to control the printer: temperature, cooling, heated bed. I can jog the settings, too.
Re: My Flash Forge Creator 3D Printer.
Patrick, Sat Aug 23 2014, 12:54AM
but it does everything in one program right? its 140$ so i goatta be sure, im still trying to figure out how to rotate the floor paths by 90 degreesso its stronger than pararllel roof and floor extruder paths in skeinforge 50.
Patrick, Sat Aug 23 2014, 12:54AM
but it does everything in one program right? its 140$ so i goatta be sure, im still trying to figure out how to rotate the floor paths by 90 degreesso its stronger than pararllel roof and floor extruder paths in skeinforge 50.
Re: My Flash Forge Creator 3D Printer.
IamSmooth, Sat Aug 23 2014, 09:53PM
Viacad2d3d allows me to create the CAD file. I design it from scratch and create the 3d model. It saves it in its native format, but allows me to export it to a STL file. I need Simplify3d to convert it to G-code. You must already have a program like this if you are making prints, so I do not believe you need Simplify3d.
Re: My Flash Forge Creator 3D Printer.
Patrick, Wed Aug 27 2014, 06:33AM
therye still spinning when it comes to the electrified external screws. though they did send me a new fan free, to replace the broken one.
im wondering, who i would report this two in the US?
Patrick, Wed Aug 27 2014, 06:33AM
therye still spinning when it comes to the electrified external screws. though they did send me a new fan free, to replace the broken one.
im wondering, who i would report this two in the US?
Re: My Flash Forge Creator 3D Printer.
Steve Conner, Wed Aug 27 2014, 08:50AM
Electrical equipment sold in the US is supposed to be safety tested by, and listed with, the Underwriters' Laboratories (UL). Most small Kickstarter type companies probably skip this as it's expensive, so this could be your stick to beat them with.
If the product doesn't carry the UL mark, then it is illegal to sell it in some states and cities. This would be a matter for local law. I don't know how this works with mail order, it could be the city or state where the company is based. You might like to try contacting the CPSC for advice.
If it does carry the UL mark then you could try reporting it to UL, they might treat it as a counterfeit mark.
Either way I would give Flash Forge a chance to rectify the problem before you bust out the big guns. If you threaten them with action like the above then they should cave in pretty quickly.
Having said all of that... Is the thing properly grounded? If the power supply casing isn't grounded, then the EMI filter capacitors can cause half of the line voltage to appear on it. There should be continuity between the power supply mounting screws and the ground pin of the 3-prong plug. Your outlets, extension cables etc. should all also be 3 prong and properly grounded.
Steve Conner, Wed Aug 27 2014, 08:50AM
Electrical equipment sold in the US is supposed to be safety tested by, and listed with, the Underwriters' Laboratories (UL). Most small Kickstarter type companies probably skip this as it's expensive, so this could be your stick to beat them with.
If the product doesn't carry the UL mark, then it is illegal to sell it in some states and cities. This would be a matter for local law. I don't know how this works with mail order, it could be the city or state where the company is based. You might like to try contacting the CPSC for advice.

If it does carry the UL mark then you could try reporting it to UL, they might treat it as a counterfeit mark.
Either way I would give Flash Forge a chance to rectify the problem before you bust out the big guns. If you threaten them with action like the above then they should cave in pretty quickly.
Having said all of that... Is the thing properly grounded? If the power supply casing isn't grounded, then the EMI filter capacitors can cause half of the line voltage to appear on it. There should be continuity between the power supply mounting screws and the ground pin of the 3-prong plug. Your outlets, extension cables etc. should all also be 3 prong and properly grounded.
Re: My Flash Forge Creator 3D Printer.
IamSmooth, Sun Aug 31 2014, 07:51PM
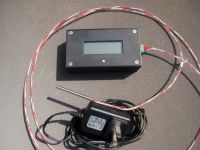
This is what I printed on mine. It's a digital thermometer that I'm thinking of producing on a limited basis for others. Patrick, if you want, I can make a volt meter for your printer. :)
IamSmooth, Sun Aug 31 2014, 07:51PM
This is what I printed on mine. It's a digital thermometer that I'm thinking of producing on a limited basis for others. Patrick, if you want, I can make a volt meter for your printer. :)

Re: My Flash Forge Creator 3D Printer.
Patrick, Tue Sept 02 2014, 05:57AM
Im thinking they didnt connect the SMPS's ground wire to the ground socket on the back. i need to look at it closer.
Patrick, Tue Sept 02 2014, 05:57AM
Im thinking they didnt connect the SMPS's ground wire to the ground socket on the back. i need to look at it closer.
Re: My Flash Forge Creator 3D Printer.
Patrick, Mon Sept 08 2014, 07:06PM
there is a ground cap related issue. I think is the X1/Y1 for RFI/EMI line conditioning.
the SMPS is a 'Mean Well" but does not have a UL label anywhere on it, i unscrewed it from the priner to check every inch.
Patrick, Mon Sept 08 2014, 07:06PM
there is a ground cap related issue. I think is the X1/Y1 for RFI/EMI line conditioning.
the SMPS is a 'Mean Well" but does not have a UL label anywhere on it, i unscrewed it from the priner to check every inch.
Re: My Flash Forge Creator 3D Printer.
Patrick, Mon Sept 15 2014, 04:07AM
My first parts made with Simplify3D, a program well worth its cost.
So far im real happy, still having a few kinks, but still well worth having this capability. These motor mounts are 7 grams in mass, 80% hollow ABS and cost 24 cents each, they take 41 minutes to fab. these parts are remarkably uniform in accuracy (0.02 inch) and also uniform in part to part accuracy.
Problems so far (Simplify3D) :
- cant get the table and extruder to heat up together. the machine used to, but there must be a M code I don't see.
- infill doesn't stack up in vertical shear webs, it stagers them out.
Machine:
-have one edge of part lifting still.
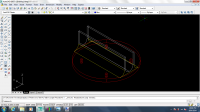
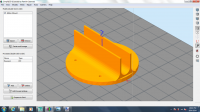
Here you can see the infill walls are staggered instead of vertically continuous. I don't know how to fix this yet.
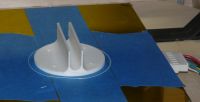
B
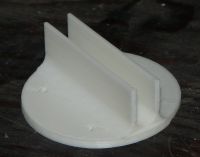
C
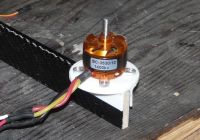
D
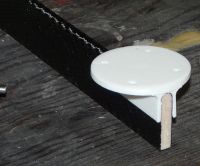
E
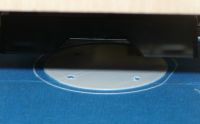
I don't expect these holes to be perfect, but id like them to at least be round, and placed more where they should be, they tended to drift inward by 0.02 inches.
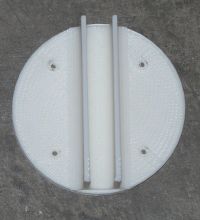
better few of mal-formed holes... I was always planning to drill them out to the final size, but I'd be nice if they were better than this.
Patrick, Mon Sept 15 2014, 04:07AM
My first parts made with Simplify3D, a program well worth its cost.
So far im real happy, still having a few kinks, but still well worth having this capability. These motor mounts are 7 grams in mass, 80% hollow ABS and cost 24 cents each, they take 41 minutes to fab. these parts are remarkably uniform in accuracy (0.02 inch) and also uniform in part to part accuracy.
Problems so far (Simplify3D) :
- cant get the table and extruder to heat up together. the machine used to, but there must be a M code I don't see.
- infill doesn't stack up in vertical shear webs, it stagers them out.
Machine:
-have one edge of part lifting still.


Here you can see the infill walls are staggered instead of vertically continuous. I don't know how to fix this yet.

B

C

D

E

I don't expect these holes to be perfect, but id like them to at least be round, and placed more where they should be, they tended to drift inward by 0.02 inches.

better few of mal-formed holes... I was always planning to drill them out to the final size, but I'd be nice if they were better than this.
Re: My Flash Forge Creator 3D Printer.
hen918, Mon Sept 15 2014, 05:07PM
Does this help?
G21 ; set units to millimeters
M190 S55 ; wait for bed temperature to be reached
M104 S200 ; set [extruder] temperature
M109 S200 ; wait for [extruder] temperature to be reached
G90 ; use absolute coordinates
G92 E0
M82 ; use absolute distances for extrusion
G/M code isn't universal so it might be different for your printer
(mine is a solidoodle 2 with a 6" bed)
Re: My Flash Forge Creator 3D Printer.
Patrick, Mon Sept 15 2014, 08:00PM
Patrick, Mon Sept 15 2014, 08:00PM
hen918 wrote ...
Does this help?
G21 ; set units to millimeters
M190 S55 ; wait for bed temperature to be reached
M104 S200 ; set [extruder] temperature
M109 S200 ; wait for [extruder] temperature to be reached
G90 ; use absolute coordinates
G92 E0
M82 ; use absolute distances for extrusion
G/M code isn't universal so it might be different for your printer
(mine is a solidoodle 2 with a 6" bed)
yes, where did you find these g codes? Is there a master list somewhere hidden on the web? It seems like there would be buttons in simplify3d to do some of this...Does this help?
G21 ; set units to millimeters
M190 S55 ; wait for bed temperature to be reached
M104 S200 ; set [extruder] temperature
M109 S200 ; wait for [extruder] temperature to be reached
G90 ; use absolute coordinates
G92 E0
M82 ; use absolute distances for extrusion
G/M code isn't universal so it might be different for your printer
(mine is a solidoodle 2 with a 6" bed)
Re: My Flash Forge Creator 3D Printer.
hen918, Mon Sept 15 2014, 08:18PM
This was some of the output of Slic3r the slicing program I use, I'm sure there is a master G-Code list out there. Somewhere!
hen918, Mon Sept 15 2014, 08:18PM
This was some of the output of Slic3r the slicing program I use, I'm sure there is a master G-Code list out there. Somewhere!
Re: My Flash Forge Creator 3D Printer.
Patrick, Mon Sept 15 2014, 08:29PM
yeah this was the single great limiting factor i foundin rep g / skeinforge... these G and M codesare every thing... and yet there hard to find.
Patrick, Mon Sept 15 2014, 08:29PM
yeah this was the single great limiting factor i foundin rep g / skeinforge... these G and M codesare every thing... and yet there hard to find.
Re: My Flash Forge Creator 3D Printer.
AndrewM, Tue Sept 30 2014, 04:57PM
Even if the infill wasn't staggered, it still wouldn't form a real shear web as you want because it alternates orthogonal directions by layer.
You can use slic3r if you want to try "non staggered" rectilinear infill... but you won't notice any difference in strength. You could try hexagonal infill with slic3r too if you really want to waste your time nerding out over infill.
Re: My Flash Forge Creator 3D Printer.
IamSmooth, Wed Oct 01 2014, 02:44AM
If you look up G-code on wikipedia there is a very long file with all the codes.
What I do is manually heat the bed and when it is within 15F of the target I warm the extruder. I then, run the program off of disk.
IamSmooth, Wed Oct 01 2014, 02:44AM
Patrick wrote ...
hen918 wrote ...
Does this help?
G21 ; set units to millimeters
M190 S55 ; wait for bed temperature to be reached
M104 S200 ; set [extruder] temperature
M109 S200 ; wait for [extruder] temperature to be reached
G90 ; use absolute coordinates
G92 E0
M82 ; use absolute distances for extrusion
G/M code isn't universal so it might be different for your printer
(mine is a solidoodle 2 with a 6" bed)
yes, where did you find these g codes? Is there a master list somewhere hidden on the web? It seems like there would be buttons in simplify3d to do some of this...Does this help?
G21 ; set units to millimeters
M190 S55 ; wait for bed temperature to be reached
M104 S200 ; set [extruder] temperature
M109 S200 ; wait for [extruder] temperature to be reached
G90 ; use absolute coordinates
G92 E0
M82 ; use absolute distances for extrusion
G/M code isn't universal so it might be different for your printer
(mine is a solidoodle 2 with a 6" bed)
If you look up G-code on wikipedia there is a very long file with all the codes.
What I do is manually heat the bed and when it is within 15F of the target I warm the extruder. I then, run the program off of disk.
Re: My Flash Forge Creator 3D Printer.
Patrick, Wed Oct 01 2014, 05:28AM
yeah i did figure out the tab that has the start script in it.
Patrick, Wed Oct 01 2014, 05:28AM
yeah i did figure out the tab that has the start script in it.
Print this page